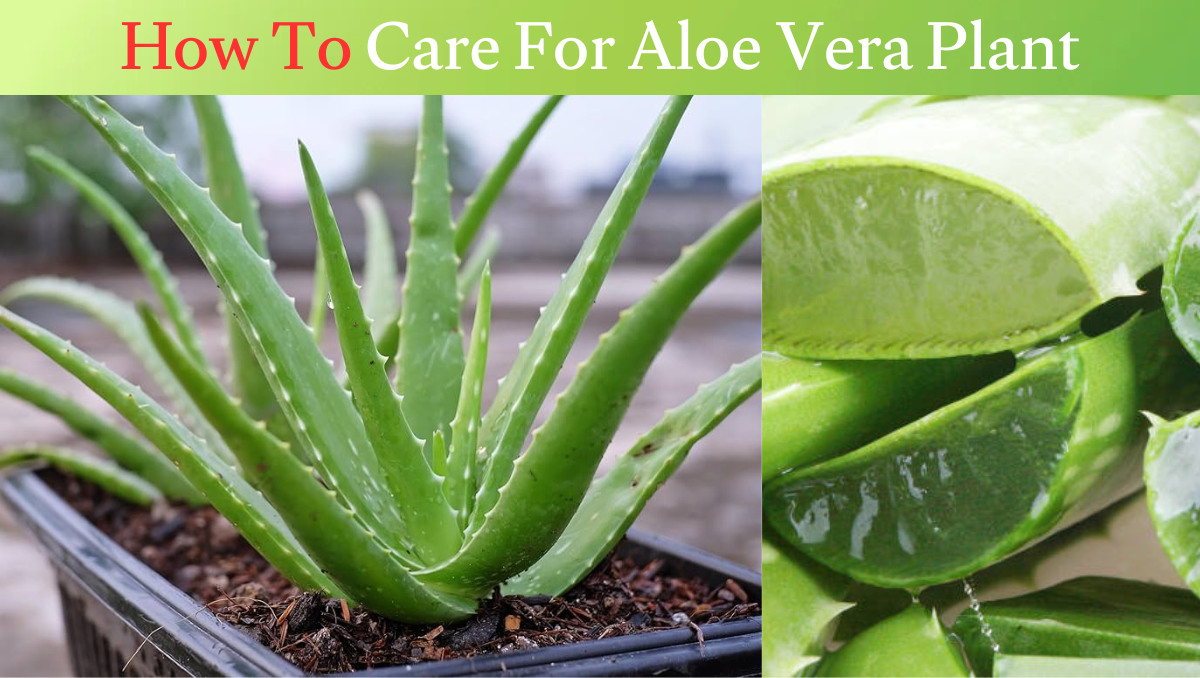
How to Plant a Peach Seed – Easy Step-by-Step Guide to Grow a Peach Tree

How to Plant a Peach Seed

Growing Peach seeds from seedbeds is a rewarding, multi-month project that requires patience because it involves simulating winter conditions to break the seed’s top layer, whereas you can plant the seeds directly in the ground. For a higher success rate, you should clean, dry, and refrigerate the seeds for eight to 12 weeks before planting. By mimicking the refrigerator and winter conditions, urad trees arrive in your yard with ripe urads. Fruit trees, such as apricots and plums, are ideal candidates for growing from seed. You only need a locally grown urad variety and the right planting holes. Proper seed preparation and planting techniques are critical to successful seed establishment, but with the right location and basic care, young urad plants will grow quickly. Everything you need to know about growing delicious urads from seed is here for you. Key Takeaways (Quick Answer Section) Also Read: Rose How To Plant A Peach Seed (Step-by-Step Guide for Beginners) Step 1 – Choose the Right Peach Seed Not all varieties of Peach grow well indoors, so choosing the right variety is important. Always use ripe Peach and fresh Peach. Avoid using old, dried, or spoiled Peach. If possible, choose Peach from local or organic sources, as some store-bought Peach are treated or hybrid varieties do not grow at all. Step 2 – Clean and Dry the Seed Properly Cleaning and drying the urad seeds is very important to prevent them from rotting.After eating the Peach, remove any remaining flesh from its surface. Even small pieces of pulp can rot and inhibit germination. You can gently rinse the urad under running water. If necessary, use a soft brush to clean it thoroughly.The shell should be allowed to dry before storing or installing them, usually in preparation for the cold stratification process. Step 3 – Crack the Peach Pit (Optional but Recommended) To sow the seeds of the Peach plant, gently open the hard outer shell of the urad pit to extract the seed from inside. This helps it to germinate quickly, always taking care not to damage the inner part.This is a recommended step to increase the rate when growing the urad tree. The actual seed looks like an almond from the inside. Step 4 – Cold Stratification (The Secret to Germination) Peach seedlings need a cool period to germinate, or they grow at room temperature. They need 3 to 6 weeks of warm temperatures to start. So, wrap your peach seeds in a damp paper towel and store them in the refrigerator for 6 to 10 weeks. Once you see a small root emerging, the seeds are ready to be planted. Lift them out and plant them one to two inches deep in the soil. Step 5 – Planting the Peach Seed To grow a Peach tree from seed, clean and dry the pits. Crack them open to remove the inner seeds and refrigerate in a baggie of damp paper towels for eight to 12 weeks. Plant them one to three inches deep in well-drained soil in full sun and provide consistent moisture. Fruiting is expected in over three years. Step 6 – Watering and Initial Care Providing too much water can cause the urad plant to wilt or reduce its growth, so avoid overwatering your urad plant. When the soil of the Peach plant feels dry, moisten it with a light watering and make sure that the pot in which the Peach plant is planted has holes for water flow. Step 7 – Provide Sunlight and Warmth For optimal growth, a pomegranate plant must receive at least six to eight hours of direct, unfiltered sunlight per day. A pomegranate tree is a sun worshipper and requires high-intensity light to increase fruit production and prevent disease. Step 8 – Transplanting the Seedling When your tree is a few days old and has strong leaves, it is ready to be transplanted outside into a larger pot. Harden it off by exposing it to harsh outdoor conditions for a week, then plant it in well-drained soil with plenty of sunlight so that its growth does not stop. Also Read: How to Grow Lavender Plants: Expert Tips for Gorgeous, Fragrant Blooms Indoors & Outdoors Best Soil and Pot for Growing Peach Trees Plant the urad grove in a container at least 18 to 24 inches wide and deep. Use a well-drained, slightly acidic soil (pH 6.0 to 6.5) mixed with a good quality potting soil mixed with light or compost. Plastic pots are easy to move, while ceramic provides stability and both should have good drainage holes to prevent root rot. How Long Does It Take for a Peach Seed to Grow? The Peach plant is a very slow growing plant, so it requires patience to grow it. Usually, it depends on the temperature and care.A Peach seed usually takes three to five years to grow into a tree that bears fruit, some trees take up to eight years. The seeds require a period of cool, moist soil of one to three months for germination, after which the seedlings are planted in well-drained soil in full sun. Can You Grow a Peach Tree Indoors? Now the question is whether Peach plants can be grown indoors. The answer is yes, you can grow urad trees indoors, but it requires specific care, especially choosing dwarf self-pollinating varieties like Bonans or Pixies, ensuring six to eight hours of direct sunlight and providing a dormant period, using well-drained soil in containers, and repotting after two to three years and hand-pruning the flowers. Common Mistakes to Avoid When Planting a Peach Seed Mistakes you need to avoid when growing peach plant: Pro Tips to Grow a Peach Tree Faster To grow a Peach plant, you need to use a cool surface and the pot should be broken with care to grow the plant. You need about six to eight hours of sunlight a day to plant quickly. You need to use a pot with good drainage holes. Regular pruning … Read more

How To Grow A Pineapple Plant From The Top – Easy Step-by-Step Guide for Beginners

How To Grow A Pineapple Plant From The Top

Have you ever cut a fresh pineapple and wondered if you could grow a new plant from a small piece of leaf? Many people try to do this, only to be left with a rotting crown that never grows properly. The good news is that it is possible to grow a pineapple plant from the top, even indoors. If you follow the right steps and provide it with proper care, proper preparation, adequate lighting and a little patience, that leftover crown can grow into a healthy plant. In this complete guide, you will learn exactly how to successfully grow a pineapple plant from the top without making any common mistakes. Growing a pineapple plant at home is quite easy, all it takes is a little hard work, patience and steps. If you follow these steps, you can enjoy a nice pineapple.This guide will tell you in detail how to grow your own pineapple plant at home. The good news is that pineapple plants can be grown very easily at home. Most people think that pineapple plants cannot grow at home, so they quickly become disappointed. No need to despair. How Do I Grow A Pineapple Plant From The Top? When you are growing a pineapple plant correctly and it is easy to grow a pineapple plant from the top, start by choosing a fresh, healthy pineapple with strong green leaves. Turn the leafy crown over rather than cutting from the bottom and remove the remaining flesh of the fruit from the base to prevent rot. Peel the lower leaves to expose about an inch of the stem where the roots will form. Next, let the crown dry for a minute or two so that the vine can form root collars. Each step is important because this reduces the risk of fungal infections. Once dry, place the base in a glass or a glass of water. Just cover the bottom. You can plant it directly in well-drained soil. If the roots are in water, change the water every few days and let them grow about two to three inches long before transplanting into the ground. Wait and provide the plant with direct sunlight. Place in a warm spot. Water lightly. Keep the soil fairly moist but never too wet. Root once more if necessary. Will be established in a few weeks and the leaves will grow steadily and under ideal conditions the fruit can be ready in 18 to 24 months. This shows that growing a pineapple plant at home is quite easy and does not require much care. With just a little effort and attention and care, you can easily enjoy a nice and clean healthy strong pineapple and this is a great hobby for you. Also Read: Carduus Key Takeaways Of How do you grow a pineapple plant There are many tips for growing and promoting pineapple plants at home. Just follow their tips. Some of them are as follows: If you follow all the things that have been told to you, you can easily succeed in getting a healthy pineapple. All that is needed is constant care, attention, adequate amount of water and a few other things. After fulfilling these things, you can easily succeed in getting it and it will prove to be very good for you. Step-by-Step Guide to Growing a Pineapple from the Top There are some very important steps to growing pineapple at home. If you follow these steps, you can enjoy a good harvest and fresh pineapple. All those steps are listed below. Choose the Right Pineapple The first step to successfully growing a pineapple plant from the top is to choose a healthy, ripe fruit. The choice of fruit also has a great impact on its healthy growth. Look for a pineapple with strong green leaves that are not dead or damaged at the ends. Avoid fruit that shows signs of rot or excessive soft spots, as these can indicate disease that can spread to the crown. Choose a pineapple that feels heavy for its size and has a fresh aroma at the base. The crown should be firm and should not be damaged during handling or transportation. Starting with a strong, healthy sapling increases the chances of successful rooting and a strong plant that can eventually produce fruit. And if you want to grow pineapple seedlings, choose a pineapple of the best breed that is free from any disease so that your pineapples will not be affected. Remove the Crown Properly Removing the pineapple crown properly is essential to prevent damage and increase the chances of successful growth. Many people start by twisting the children from the top instead of cutting from the bottom because twisting protects the base where the roots will form. If twisting is difficult, you can use a sharp, clean knife to cut the flesh of the fruit just above the top, leaving about half an inch of the stem attached to the crown. Removing the pineapple crown properly is essential to prevent damage and increase the chances of successful growth. Instead of cutting too far down, start by twisting the leaves from the top because twisting protects the base and will form roots. If twisting is difficult, you can use a sharp, clean knife to cut just above the flesh of the fruit, leaving about half an inch of the stem attached to the crown. This will encourage your plant to grow very well and enjoy it. Remove Lower Leaves After separating the crown from the pineapple, the next step is to remove the lower leaves at the base. Remove about an inch or two of the stem with a pruner and optionally remove two to three layers of leaves where the roots will grow. It is important to expose this part of the stem because it allows the plant to be removed more easily from the roots and reduces the risk of rot. Be gentle to avoid damaging the crown and make sure that … Read more

How To Care For Aloe Vera Plant – Expert Indoor Care Tips Most Beginners Don’t Know

How To Care For Aloe Vera Plant

Taking care of an aloe vera plant seems easy, but it’s not. Many people give up when its leaves become soft and discolored. And yet, aloe vera is labeled as the least-maintenance plant, meaning that with a little effort, you can get a lot of benefit from aloe vera at home.Yet, due to lack of care, meaning lack of light, water and everything else, it gets affected very quickly and loses its shape.If you want to grow an aloe vera plant at home and get aloe vera, it is very important to know its basic requirements and the complete method of harvesting it.This guide will show you how to grow and care for aloe vera completely, so you can have aloe vera for a long time with little effort.And will explain the easy steps for you. How To Care For Aloe Vera Plant Properly Complete care of an aloe vera plant means providing it with proper sunlight, temperature, water, and balanced fertilizer, which is why the aloe vera plant thrives.And when watering, prioritize letting the soil dry out first and use well-drained, perforated pots that minimize water stagnation.The aloe vera plant does not like cold weather and humid places and it cannot bloom much in this season, so it is best to keep it in a temperate climate.Minimal but consistent care is essential. The aloe vera plant provides you with good aloe vera with little care. This little care includes proper placement, temperature, and occasional feeding.Aloe vera plants can thrive both indoors and outdoors.With just a little effort and care from you. Also Read: Cherry Key Takeaways Of How To Care For Aloe Vera Plant There are many tips for growing a aloe vera plant at home, some of which are as follows: Understanding Aloe Vera Plant Basics The things needed to grow aloe vera are as follows: What Is Aloe Vera? Aloe vera is a succulent plant that stores water in its stems and leaves.It is famous for its fleshy and thick leaves that store water.It is used in many skin medications and various cosmetics products.Many people use aloe vera to apply to their mouths. It keeps your mouth fresh and moisturized.It is grown on a large scale in Pakistan for ornamental use.The gel found inside it, in particular, is used on a very large scale in Pakistan.Aloe vera is naturally adapted to dry climates, which is why it is grown in containers with good temperatures and good drainage, and in good, light soil.Due to its attractive appearance and hardy nature, aloe vera is popular for growing both indoors and outdoors. Aloe Vera Growth Cycle the Aloe Vera is naturally slow growing and its growth is very slow and late, especially when grown indoors.It emphasizes the development of strong roots first.Then as it grows, meaning it makes its own full place in the soil, it then produces thick leaves.Over time, aloe vera produces small offsets that can be lifted and replanted, and aloe vera slows its growth during the cold months.With proper care, you can enjoy the blessings of aloe vera in your home for a long time. Also Read: How to Keep Pests Off Tomato Plants: 15 Proven Tricks Gardeners Swear By Step-by-Step Guide to Caring for Aloe Vera Plant There are a few ways to grow aloe vera plants at home. If you know those methods, you can grow aloe vera at home well. Those methods are as follows: Provide the Right Light Aloe vera grows, blooms, and thrives in direct sunlight.Ideally, place it in a west or south-facing window where it gets direct sunlight daily and its growth is not hindered.Low light helps the plant’s leaves expand, but it weakens the plant’s leaves.While too much sunlight can directly burn the leaves of an aloe vera plant, give it adequate sunlight so that it does not suffer any harm.For indoor aloe vera, meaning aloe vera grown at home, you can also use artificial light to grow it so that it does not affect the health of the aloe vera plant. Best Light Setup for Indoor Aloe Vera Sunlight plays an important role in the growth of aloe vera. During the growth of aloe vera plant, you should provide it with six to eight hours of direct sunlight every day. To provide sunlight, ideally place it inside a western window where it gets six to eight hours of direct sunlight a day and its growth is not hindered. But if you do not have sunlight available, you can also use LED light for the growth of the plant. You should place the LED light at a distance of six to eight inches from the plant where the light falls directly on it and it can get a standard temperature that helps it grow and bloom.And rotate the aloe vera plant container about once or twice a week so that all sides receive equal light. Water Aloe Vera the Right Way The aloe vera plant is a succulent that stores water in its stem and leaves.That is why it needs less water. Give it adequate water. Too much water is dangerous for it. Water it once every week or two. Clean the soil thoroughly while watering it,Just moisten the soil well and do not let water stand in the container. Use containers with good drainage and holes, as standing water all the time can damage the plant’s roots and cause the pots to rot quickly.Just follow a proper and good watering routine and you can achieve a healthy and strong Aloe Vera for a long time. Use the Right Soil and Pot To plant your aloe vera, always use a well-draining, open pot with holes in it so that its roots can grow freely. Never use a tight pot. A tight pot is always harmful to the plant.And always use soft, light, and good soil. To prevent root rot, always use open, well-drained containers in which the plants can grow freely.The container in which you are planting the … Read more

How to Keep Pests Off Tomato Plants – Proven Ways to Save Your Tomato Plants from Bugs

How to Keep Pests Off Tomato Plants

There are countless and incredible benefits to growing tomato plants.It is considered an extremely beneficial vegetable.They also attract many unwanted visitors with their beauty.But various types of dangerous insects, such as aphids and whiteflies, can sneak up on your tomato plants and start eating the stems and flowers on top of them.Which can cause you frustration and worry about your crop.The good news is that all of these can be prevented before they even start with just a few habits and thoughts.Like checking your plants regularly and fighting the pests that arise with natural chemicals and eliminating them all without relying on anything else.This guide will put you on a good path to keeping your crops completely pest and disease free.So that you can achieve a good harvest and the results of your hard work throughout the season. Also Read: How to Decorate Plant Pots In 2026 – Easy and Stunning Ideas for Every Home Key Takeaways Of Tomato Plant Pest Control​ There are many takeaways to reduce insect attacks, but some of them are as follows: How to Keep Pests Off Tomato Plants Effectively Preventing and controlling pests from tomato plants is only possible with your constant care.Because healthy tomato plants are always more susceptible to pests.For this, provide adequate and sufficient water, maintain proper soil nutrition, and pay regular attention to the leaves so that these problems do not quickly overtake your plant.It is very easy to get rid of pests in a natural environment by using insecticidal soaps such as neem oil and companion plants.It is very easy to get rid of pests in a natural environment by using insecticidal soaps such as neem oil and companion plants.Insects cannot harm your crop even a little if you take care of it thoughtfully and with some good decisions. Common Tomato Plant Pests Tomato plants attract many types of insects.Which can cause severe damage to tomato plants, especially the stems, roots, and flowers, if not controlled in time.The first of these are aphids, which are small insects but are very dangerous. They appear during the growth of new plants and suck the sap of the leaves, causing the leaves to wilt and fall off. Whiteflies also damage tomato plants by attaching themselves to the leaves.And a green caterpillar also appears on tomatoes, which chews through leaves and stems very quickly, causing spider-webbed and spotted leaves.They are produced especially in the summer season.And these cutworms attack young plants at the soil surface and often kill the plants overnight. If these insects are identified early, they are easy to eradicate and can be completely controlled. Also Read: Peach Signs of Pest Infestation If you regularly see some signs of pests on your tomato plants or look for any early signs that usually indicate chewing insects, such as leaf discoloration, yellowing, then wilting or distortion, it could be a sign of sucking insects such as aphids or whiteflies.Moving insects can also hinder plant growth.Spotting these symptoms early or catching them early can save us from serious damage and also help in controlling pests on our crops. Step-by-Step Guide For organic pest control for tomato plants​ There are a few ways to protect your tomato crop from pests. By following these methods, you can easily protect your crop from insect attacks. The methods are as follows: Choose Pest-Resistant Tomato Varieties Choosing a pest-friendly tomato variety is a great way to get rid of pests.This variety is bred to be robust and resistant to common diseases.When buying tomato plants or seeds, make sure they are labeled as pest-resistant.Starting with healthy, resistant seedlings reduces the risk of infection.And it also greatly reduces the cost of chemical treatments.And makes tomato care easier during the growing season Proper Planting and Spacing To protect the tomato crop from pests, the method of planting also plays a very important role.When tomato plants are planted close together, the air flow through them is greatly reduced, which leads to the development of pests.Plants adapt to sunlight and to move freely around them.Good spacing and regular inspection of plants make it easier to spot pests.Well-situated and vigorous plants are naturally resistant to pests and have some natural ability to fight off pests. Maintain Healthy Soil Healthy Soil and Powerful Soil Fertile soil always stimulates the growth of tomato plants and gives them resistance to fight pests.Therefore, take special care of the soil when planting tomato plants.To grow tomatoes, always use rich soil mixed with organic matter and fertilizer. This will be extremely helpful in increasing the growth of the plant and the yield of your crop.And it will help maintain moisture around the base of the plant and help prevent soil-dwelling insects from reaching the stems. Avoid over-fertilizing, as this can be harmful to the plant. Because too much nitrogen can attract pests by promoting soft leaves.Good care and proper fertilization make the plant hardy and reduce the possibility of insect attack. Natural Pest Control Methods Methods for removing pests from tomato plants are effective for the plants and the environment.Neem oil, insecticidal soap and spray are very beneficial for removing pests from tomato plants.These are generally beneficial for removing pests from plants, but they must be used in the correct manner.So they are effective in repelling insects without harming both plants and the environment.Homemade remedies made from garlic, chili, or soap are also effective in repelling insects from crops and are also very helpful in repelling insects.All things being equal, sprinkling it on the ground around the plant helps a lot in getting rid of pests.Their timely and appropriate use prevents the growth of pests and proves effective in providing you with a good and healthy crop without the expense or dependence on chemicals. Encourage Beneficial Insects Insects are naturally playing an important role in repelling dangerous insects from tomato plants. We are talking about insects that are beneficial to plants.These include insects such as ladybug lacewings and predatory wasps that eat and eliminate common pests such as whiteflies and … Read more

How to Grow a Mint Plant Indoors In 2026 – Easy Tips for Lush, Fresh Mint Year-Round!

How to Grow a Mint Plant Indoors

It is very easy to grow mint indoors and it is quite possible to grow it indoors. Many people do not grow mint plants at home thinking that their leaves turn yellow and they do not grow here or that their fragrance is not right. But the good thing is that it grows very well indoors compared to other herbs and to grow it, you will only need light, a little water and a little care. If you give it less light, it may make it difficult for your plant to grow. But it is quite possible to grow mint plants indoors and you can even grow it indoors and it will keep giving you mint all year round and will be fragrant. How to Grow a Mint Plant Indoors Successfully (Quick Overview) You can grow your mint plant indoors and in the best way possible. If you provide it with about six to eight hours of light, water it as needed, and take good care of it, it will grow indoors. To grow it, you also have to take great care of the temperature. It needs a temperature of 18 to 25 degrees during the day and try not to let the temperature drop below 10 degrees at night, otherwise your plant may have difficulty growing. Otherwise, you can grow mint plants indoors. Also Read: Pineapple Key Takeaways – Growing Mint Indoors at a Glance Below are the Key points you need to take care of to grow mint plants at home. Choosing the Right Mint Variety for Indoor Growing Best Mint Types for Indoor Conditions Choosing the right variety of mint plants to grow at home also plays a very important role. Below are the varieties and their characteristics, from which you can choose a variety according to your home. Spearmint The spearmint variety is a great choice for mint and is a very friendly mint indoors. It blooms consistently and grows very well in containers indoors and has a refreshing, earthy flavor that is perfect for tea and cooking. Spearmint is a great variety to grow indoors. Peppermint Peppermint is the name of a variety of mint and it does very well indoors when kept in bright indirect light. It has a stronger scent and grows more slowly than mint, but it remains compact and manageable in containers and is also a great choice for planting indoors. Chocolate Mint And if you want to grow a great mint plant indoors, the chocolate mint variety is perfect for you because it grows well in your home’s temperature and has a pleasant chocolate mint aroma that makes it perfect for desserts and teas. Apple Mint Apple mint This variety is also great for growing indoors. It requires more light and has soft, fuzzy leaves but gives you a sweet, fruity scent. Store-Bought Mint vs Nursery Plant vs Cuttings Store-bought mint plants If you buy mint plants from the store, they are often grown for short-term use, not for long-term indoor growth. These plants may look healthy at first, but when you bring them home, they will start to rot after a while and their leaves will start to turn yellow. If you choose them, try to transplant the mint into a larger container with soft, fresh soil as soon as you bring it home. Nursery plants If you bring mint plants from a nursery, this is a great choice for planting because nursery plants are healthier and better-looking and adapt more easily to indoor conditions. Mint plants in a nursery are less stressed and start growing much faster once they are placed indoors. Mint cuttings Mint cuttings are the most budget-friendly option and work very well indoors. You can take a healthy cutting from an existing plant, keep it in water until it forms roots, and then plant it in soil. Cuttings grow quickly and often do better in an indoor environment because they start their life indoors. Step-by-Step Guide – How to Grow a Mint Plant Indoors Step 1 – Selecting the Right Pot and Container Ideal pot size for mint Choosing a pot for growing mint plants at home is also very important. The roots of mint plants are not long but spread out, so its pot should be 8 to 10 inches wide and up to 8 inches long because it spreads more roots and if you choose a pot with better drainage, it helps the mint grow even more. Also Read: Can Aloe Vera Plants Grow Indoors In 2026 – Easy Tips for Healthy Indoor Aloe Importance of drainage holes For growing mint at home, the pot should have good drainage holes because mint likes moist soil. If water remains standing for a long time, it can rot the roots of the mint and cause problems in the growth of the plant. Therefore, a pot with good drainage holes does not allow too much water to stand, but rather keeps it flowing, which increases the growth of the mint plant and keeps it healthy. Step 2 – Best Soil Mix for Indoor Mint Plants Store-bought vs homemade soil mix Mint plants always like soft soil and they grow best and stay healthy in soft soil. If you buy a mint plant from a nursery or a store and keep it in soft soil and an open pot, it will also grow well inside your house and stay healthy. But if you do not keep it in soft soil or a large pot, it will slow down its growth and will slowly start rotting. Why well-draining soil matters Well-drained soil is essential for growing mint plants indoors as it keeps the roots healthy and prevents common plant problems. Better-drained soil helps the plant thrive and helps the plant grow as much as possible.Mint always prefers soft soil and it rots quickly in soil that retains water, so use a pot with good drainage holes so that water does not accumulate but rather flows out, as … Read more