How to Grow Lavender Plants: Expert Tips for Gorgeous, Fragrant Blooms Indoors & Outdoors

How to Grow Lavender Plants

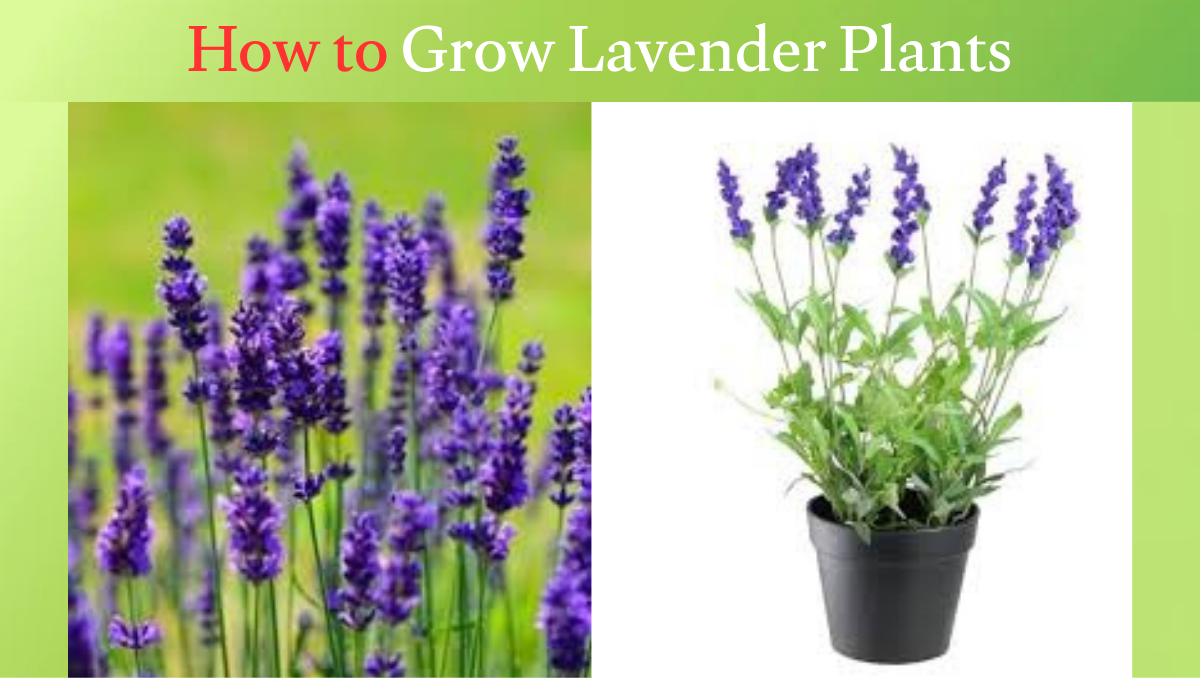
Now the question is, what is the secret to growing a lavender plant? Lavender needs full sun with good drainage. It is more likely to die from excessive moisture than from cold in the winter. A pot is a great way to provide drainage, although the entire plant will be more vulnerable to cold temperatures than in the ground. And most lavender plants do not thrive in the ground and in very humid or cold weather, although English lavender can tolerate some cold weather. Most varieties are hardy from zones five to nine. How To Grow Lavender Plants (Complete Beginner’s Guide) Lavender, with its fragrant flowers and endless uses, proves to be a total game-changer plant for your garden or hair salon, with its eye-catching appearance proving to be a secret weapon for your entire liner’s wellness routine.Its cooling vibes can help you relax and sleep better, which is essential for your self-care regimen. You can even use it to make refreshing sprays or soothing bath salts, whether you’re into self-care, creating a peaceful home, or just enjoying your natural beauty. Also Read: Morus (plant) Key Takeaways (Quick Summary for Fast Readers) Below are some Key Takeaways for fast readers: Understanding Lavender Plants Before You Start Types of Lavender Plants The main varieties of lavender plants include English, (Sweetest, Hardy, London), Large, (Oily, Hybrid, Pawnee, Rabbit Ear), and French, with toothed leaves and a light fragrance. They require full sun and good drainage. They are harvested annually and all varieties are cultivated for their pure fragrance and fragrance. Best Climate for Lavender The best varieties of linden for summer The best climate for linden in the garden is a room-like environment with hot, dry summers, mild winters, and six to eight hours of direct, full sunlight per day. They thrive in zones five to nine in dry, sandy or rocky soil with low moisture and prefer temperatures between 18 and 30 degrees Celsius to prevent rot. Indoor vs Outdoor Lavender Growth Growing lavender plants both indoors and outdoors has its own characteristics. Growing Lavender Indoor Indoors, it requires six to eight hours of maximum sunlight or LED grow lights, very well-drained soil, and occasional watering when the top inch or two is dry. Use a pot with drainage holes, preferably terracotta, and place it in a cool, sunny, and well-ventilated area to prevent root rot. Growing Lavender Outdoor Growing lavender outdoors requires six to eight hours of full sun and very well-drained, slightly alkaline soil, and low moisture once established. Plant in spring, space plants one to three inches apart, and avoid heavy, wet soil. Prune back one-third of the plants annually after flowering to prevent wood rot. Which Option Is Better? Step-by-Step Guide: How To Grow Lavender Plants Successfully Step 1: Choose the Right Lavender Variety Varieties with Lavender for Your Dry Herbs Choosing the right lavender depends on your climate and use. English lavender is best for cold hardiness zones five to nine and is best for cooking, while French lavender and Pinot Noir thrive in warmer areas with high humidity in zones 8 to 11. Choose Lavadin hybrids for intense aroma and oil production and larger size. Also Read: How Do I Grow Carrot Plants Indoors – Secret Tips for Bigger, Sweeter Carrots at Home! Step 2: Select the Perfect Location Choosing the best location for lavender is very important because these lavender plants are sensitive to waterlogging and require specific conditions to thrive. The ideal location provides optimal drainage and good air circulation. Step 3: Prepare Well-Draining Soil Lowlanders require sandy alkaline well-drained soil with a pH of 7 to 7.3. For optimum growth, mix equal parts of potting soil, coarse sand, and peat moss in about one part each and plant in raised mounds using terracotta pots, ensuring at least six hours of sun and good drainage. Step 4: Planting Lavender Seeds or Cuttings Lavenders is best propagated by two to four inch softwood semi-hardy cuttings in the summer for faster, uniform results or by starting from seed indoors 10 weeks before the last frost. Both methods require well-drained, sandy soil and full sun, and the cuttings should be kept moist and covered with plastic and should root in three to six weeks. While seeds require light to germinate, they may require a frost rating. Step 5: Watering the Right Way Watering lavender properly depends on the principle of drought tolerance once established. Overwatering is the most common cause of lavender plant death, which can cause root rot and ultimately a dead plant. The goal is to keep the soil lightly moist, never letting it dry out. Step 6: Provide Proper Sunlight To provide adequate sunlight for your allamander plant, place it in a location that receives full sun, defined as at least six to eight hours of direct sunlight per day. As a native of the Mediterranean, allamanders require high levels of light to thrive and produce fragrant flowers and to avoid becoming leggy. Step 7: Pruning and Maintenance Prune the lavenders twice a year, from the base in early spring to remove weather damage and later in late summer to maintain a plumulate dome shape. Cut back green stems and never into old wood. Care for it in full sun, well-drained soil, and minimal water and fertilizer. Best Soil, Pot, and Fertilizer for Lavender Ideal Soil Mix for Lavender Plants The ideal soil mix for under is a fast-draining nutrient-poor soil with an alkaline value of 6.5 to7.5 pH. A perfect mix contains equal parts of clay, hard, sharp sand grit, and perlite or comite to ensure excellent drainage. Avoid heavy soils with excessive organic matter and moisture-retaining soils. Choose The Right Pot For Soil For lavender, choose a 12- to 16-inch diameter terracotta or clay pot with ample drainage holes, and because this material allows the soil to dry out and prevents the roots from rotting, use a fast-draining potting mix to mimic the conditions of a Mediterranean garden, such as … Read more

How Do I Grow An Onion Plants Indoors – Easy Step-by-Step Guide for Beginners (Fast Results!)

How Do I Grow An Onion Plants Indoors

Growing onion plants indoors is a great low-maintenance way to jumpstart your gardening season or grow fresh, crisp green onions all year round. Growing full-sized, mature bulbs indoors requires space and light, making it difficult to start them indoors from seed or sets. It is most effective to start them indoors from seed or sets, as is growing smaller varieties of green onions for a quick, continuous harvest. In mid-February, sow onion seeds in random numbers in four plastic pots. I usually aim for 25 or more. I space them about one by one in the pot, lightly covering them with soil. I bury the seeds one by one or more and place a germination dome on top. How Do I Grow An Onion Plants Indoors Start the onions indoors by planting seeds one by four inches deep in trays with seed starting mix about eight to 10 weeks before your last frost date and keep the soil moist. Provide 12 to 14 hours of light through a grow light or bright window and maintain the surrounding temperature. Trim the tops back to four inches to encourage rooting. Also Read: Cactus Key Takeaways There are many techniques for growing onion plants at home, some of which are listed below. Step-by-Step Guide to Growing Cilantro Plants It is absolutely possible to grow onion seedlings at home. All you need is a little hard work, dedication, and patience. If you follow a few basic steps, you can easily grow the plants at home. Choose Quality Seeds To select high-quality onion seeds, choose varieties that are suitable for your local climate and daylight conditions, such as short-day and long-day varieties, non-hardy varieties, certified from a reputable supplier, and have a high germination rate of 80 to 90 percent. Disease resistance and the desired bulb size and color are preferred. Adequate and consistent moisture is essential for germination. Select the Proper Container Choosing the right container for onion plants depends on whether you are planting them for full-sized bulbs or for green onions. Since onions have a shallow root system but also need space to spread out, the best containers are at least 10 inches deep with excellent drainage. Use the Right Soil Mix Onion plants thrive in well-drained sandy loam or loam soil with a pH of 6.2 to 6.8. Improve heavy clay or sandy soil by mixing in one to two inches of compost or well-rotted manure to ensure high organic matter content. Soil should be loose for bulb expansion. Provides enough nitrogen to encourage leaf growth. Also Read: How Do I Grow Carrot Plants Indoors – Secret Tips for Bigger, Sweeter Carrots at Home! Planting Onion Seeds or Sets Onions can also be grown from either or both sets of small immature bulbs, with the latter offering greater variety and lower cost, while sets provide a quicker, easier and earlier start. Seeds require sowing indoors in late winter to early spring, while sets can be planted directly in the garden four to eight centimetres deep. Provide The Proper Light Onion plants require full sun, which means at least six to eight hours of direct, unfiltered sunlight per day, although more than 12 hours is best for maximum bulb formation. They rely heavily on light for energy and, importantly, to stimulate the bulbing process, which is determined by the number of daylight hours. Fertilizing for Healthy Growth For healthy, high-yielding onions, apply a suitable fertilizer such as 10-10-10 by weight at planting time. Then, apply a high-nitrogen side dressing every three to four weeks until mid-July to promote leaf growth. Onions need consistent moisture, sleepers, and high fertility to produce large bulbs. Usually, in late June or early July, when the bulbs begin to push out the soil, stop fertilizing. This is the best method. Harvesting Indoor Onions Harvest home-grown onions when 50 to 75 percent of the small yellow leaves have dried and fallen off, indicating maturity. To avoid bruising, gently lift the bulbs from the container using your hands or a small shovel and cure them in a warm, dry, well-ventilated area at 75 to 90 degrees for two to four weeks before trimming the tops to one to two inches for storage.They are ready to be cut approximately four to six weeks after planting and they reach their perfect size. Also Read: How To Grow Coriander Plant Indoor – Secret Tips for Fast Growth & Huge Harvest Common Problems When Growing Onions Indoors Many people make many mistakes while growing onions at home and then later face disappointment due to the difficulties. Below are the mistakes that you can avoid and enjoy a good onion crop. Mistakes To Avoid Many people make many mistakes when growing onion plants at home. Below are the mistakes that you can avoid and easily grow onion plants at home. Outdoors vs Indoors Onion Growing You can easily grow onion plants anywhere inside or outside the house, but there are some differences between them. Their care, their ingredients, the amount of light they need, and the amount of food they need are all different. The method of growing them indoors and outdoors is given below. Growing Onions Outdoors Plant onions outdoors in full sun for more than six hours a day in loose, well-drained soil with a pH of 6.0 to 7.0. Plant or transplant them four to six inches apart, one inch deep. Ensure consistent moisture two to four weeks before the last spring frost and fertilize every four weeks. Keep them weed-free to maximize bulb size. Growing Onions Indoors Growing onions indoors requires nutrient-rich soil, shallow containers no more than four inches deep, and 12 to 14 hours of sunlight per day. Start seeds 10 weeks before the last frost and plant them one to four inches deep, keeping the soil consistently moist. To encourage vigor, prune the plants back to three to four inches and transplant them outdoors when they are five to six inches tall. Also Read: How Do … Read more

How Do I Grow Carrot Plants Indoors? Simple Secrets to Grow Bigger and Sweeter Carrots at Home

How Do I Grow Carrot Plants Indoors

Use deep pots to grow carrots indoors. The container should be at least 10 to 12 inches deep with drainage holes. These holes should be filled with loose sandy potting mix. Plant the seeds about an inch deep in the soil. Keep the soil consistently moist and place in a sunny spot or under a grow light for 12 hours. Thin the plants to two to three inches apart and harvest in 55 to 80 days. Therefore, for indoor carrots and other long-day root crops, you need to maximize your light intensity during the short 12-hour photoperiod. How Do I Grow Carrot Plants Indoors Choose shallow-rooted root crops such as beets and grow them in containers at least 8 to 12 inches deep with drainage holes and use a loose sandy potting mix. Plant the seeds one to four inches deep and keep them consistently moist. Provide 10 to 12 hours of sunlight per day and maintain a moderate temperature. This is most effective for the plant. Also Read: Spinach Key Takeaways There are many ways to grow carrot plants at home that can benefit you greatly. Some of them are as follows: Understanding Carrot Growth Indoors Easy Ways to Grow Carrots Indoors Growing carrots indoors requires a cool area at least 8 to 12 inches deep with consistent moisture and more than six hours of bright light or more than 12 hours of LED light and use a loose sandy potting mix. Sow seeds lightly and thin out plants to prevent crowding. They take 10 to 16 weeks to mature, so be patient.So that your sweet red and flavorful carrots are ready to ripen. Step-by-Step Guide to Growing Carrot Plants Indoors There are many easy ways to grow carrots at home, all of which are listed below. Choose the Right Carrot Variety Choose a carrot variety based on your soil type, container depth, and intended use. Choose a hardy variety like snip or peri-cnn for heavy or shallow soil. Choose knotties for deep clay and he king. Use a grower for storage and juice extraction. For higher yields in deep soil, use a grower. These are the best carrot varieties that you can easily enjoy a carrot crop of your choice. Select a Deep Container Choose a container that is at least 12 to 20 inches deep for growing carrot roots. Make sure it has adequate drainage holes to prevent rot. Ideal options include a five-gallon plastic bucket, large cloth grow bags, or deep planters. Use a light, well-draining potting mix to allow the roots to straighten out. This is quite beneficial for the plant. Prepare Loose, Well-Draining Soil Preparing loose, well-drained soil is the most important step in growing straight, thornless, and healthy carrots. Carrots need a deep, light, nutrient-rich soil of 12 to 14 inches so that their roots do not encounter obstacles like rocks or compacted soil and can grow easily. Plant Carrot Seeds Properly Now the question is how do I grow carrot seedlings? A guide to planting and caring for the seedlings. Plant carrot seeds directly in loose, rock-free soil, spacing them 12 to 18 inches apart, inches deep and one to two inches apart. Maintain consistent moisture for 10 to 21 days until they sprout. Often use mulch to cover the soil and keep it moist. Once they reach a height of two to five inches, thin them to two to three inches. This is a complete guide to planting them. Also Read: How To Grow Coriander Plant Indoor – Secret Tips for Fast Growth & Huge Harvest Provide Proper Light Proper light soil, which means well-formed carrots and sweet carrots, requires specific conditions to grow. Basically, deep, loose loamy soil that is free of rocks and heavy clay. The plants thrive in full sun for six to eight hours a day and cool weather. For ideal growth, temperatures between 55 and 75 degrees Fahrenheit are essential for proper plant growth. Water Correctly Water carrots by keeping the soil consistently moist to prevent splitting and bitterness. Aim for one inch of water per week, increasing to two inches as the roots mature. Deep, occasional watering encourages root rot of long, straight roots, while overwatering causes stunted growth. Use drip irrigation or soak the rows thoroughly. This is the perfect way to water carrot plants. Thin Seedlings Early Thinning carrot seedlings early when they are two to three inches tall is essential to prevent overcrowding and spindly roots. Keep the initial spacing to one inch and then thin them a second time to two to three inches apart. Use scissors to cut the tops at the soil level so as not to disturb the roots. Fertilizing Carefully It is very important to fertilize carrots carefully because they are root crops that can become hairy or misshapen if overfed or given the wrong nutrients. It is essential for successful straight and sweet carrots. Keep nitrogen low, focus on phosphorus for roots, and potassium for flavor. Harvesting Indoor Carrots How to Grow Carrots Indoors in Flower Pots Indoor carrots are ready to harvest two to three months after sowing or when they start to develop a shoulder. Check for maturity by pushing away the soil to see the size of the root, up to an inch in diameter, and then gently twist and then pull upwards or use a small trowel to loosen the soil and avoid pulling the carrots, which will prove quite beneficial.Carrots in Pakistan are mainly harvested during the four-six day dry season from November to March, with the young being harvested from December to February and depending on the cool temperatures, harvesting is mostly done by hand 90 to 40 days after planting for best color and flavor. If loosening the soil by removing the roots is involved, the average yield is 10 to 18 tons per acre in Pakistan. Common Problems When Growing Carrots Indoors Many people face many problems when growing carrot plants at home. Below are the problems … Read more

How To Grow Coriander Plant Indoor – Easy Secrets to Grow Fresh, Fragrant Cilantro at Home

How To Grow Coriander Plant

Many people think that growing coriander indoors is quite difficult, but it is not at all. It is very easy to find coriander on Google because it is one of the herbs that grows very quickly and it is the fastest growing herb. Many people bring coriander from the market, but after some time it withers or loses its flavor, which does not give a good taste to food. So, you can grow your own coriander indoors and whenever you have to cook, you can break the coriander and add it, which will give the best taste and you will be able to enjoy it. Coriander can now be grown indoors easily with a little care, proper water, a small pot and proper lighting, and this basil grows perfectly indoors. Key Takeaways Of How To Grow Coriander Plant Here are some points that you can follow to easily grow coriander inside your home: Understanding Coriander Plant Basics What Is Coriander Plant? Coriander is one of the fastest growing herbs and it is very easy to grow indoors and you can also grow basil indoors from it. Some people think that coriander is very difficult to grow indoors, but this is not the case at all. Rather, it grows very easily indoors and you can grow it with a little care, proper water, proper lighting and in a small pot. It is used in various ways. The leaves are often used in salads etc. and coriander is used in cooking all over the world for its fresh taste and aroma. Coriander is an annual plant which means that it completes its life cycle in one season. It grows rapidly and if properly cared for, can be harvested several times. It grows indoors all year round. Also Read: Mentha Ideal Growing Conditions Best Time to Grow Coriander To grow coriander, you need a temperature of 15 to 25 degrees. Most coriander plants grow in spring, autumn or mild winter, as they are more susceptible to heat and the coriander plant grows very quickly, as its leaves grow less due to the temperature, which also reduces the flavor. That is why this plant thrives from spring to early summer. If you grow coriander indoors, you can plant it at any time of the year as long as you provide enough sunlight and maintain a comfortable temperature. Step-by-Step Guide – How To Grow Coriander Plant Successfully Step 1 – Choose Quality Coriander Seeds Choosing the right seeds is very important for growing coriander plants at home. A right seed helps a lot in growing coriander plants at home and that is what makes your plant grow. You can buy coriander seeds from the store and grow them at home or you can grow coriander from your kitchen. Just make sure that the seeds are not old but new because new seeds grow well and the seeds are not roasted because roasted seeds do not grow. To grow coriander plants quickly at home, crush coriander seeds in half and put them in water 12 to 24 hours before planting the coriander seeds and after 12 to 24 hours, take them out of the water and water them well, which will help your coriander plant grow very quickly and very well. Step 2 – Prepare the Soil Properly Soil also plays a very important role in growing coriander plants healthily and well. You must use soft and well-drained soil because this plant likes soft soil. Avoid too hard, compact or heavy soil because it can hold too much water and can cause root rot. And be careful that you keep the soil slightly moist and avoid overwatering. You can also prepare a spice soil mixture by mixing garden soil and sand in equal parts. Before planting, make sure that the soil is soft and free of stones or debris. Step 3 – Sow the Seeds Correctly Sowing the seeds correctly is also an important step in successfully growing coriander plants. After preparing your seeds and soil, sprinkle crushed coriander seeds on top of the soil surface and bury your coriander seeds 0.5 or 1 inch below the soil surface. Sowing the seeds too deep can cause problems for the coriander plant to grow. After planting the seeds, lightly moisten the soil with a spray bottle or any container, etc. Add water lightly so that the coriander seeds do not become displaced and stay in place. After about 7 to 10 days, your coriander plant will start to grow. Step 4 – Watering Techniques While learning how to grow coriander plants, it is also important to provide proper watering because both overwatering and underwatering can harm the plant. Coriander likes moist soil. It does not like too much water, so give it a light watering when the top inch or two of the soil feels dry. Give it enough water to moisten the soil. Avoid overwatering. When you sow the seeds, water them with a spray bottle or container. Later, when they start to sprout, you can water them normally and make sure that there are drainage holes in the pot because standing water for too long can cause coriander roots to rot. Watering is necessary every one to two days if the soil feels dry. Also Read: How To Grow Banana Plants Indoors – Easy Step-by-Step Guide for Big Leaves & Fast Growth Step 5 – Provide Proper Sunlight Light also plays a very important role in growing coriander plants at home. That is why if you are growing coriander plants at home, place them in a south or west-facing window because the south and west-facing windows receive more light during the day. Coriander plants need 6 to 8 hours of light for optimal growth. If you keep them in a grow light, they need 10 to 12 hours of light daily. If you give them the right light, your plant will grow healthy and fast. If there is any deficiency in its light, your … Read more

How Do You Grow Cilantro Plants – A Simple Guide to Growing Fresh Cilantro at Home

How Do You Grow Cilantro Plants

Siltrano is a fast-growing, cool-season annual herb that grows from seed in full sun to partial shade with well-drained soil. Plant in early spring or fall because the heat causes it to flower early. Sow seeds one to four inches deep, one to two inches apart. Keep the soil moist for about 40 to 45 days for a harvest.Growing the plant from seed is quite easy, although small plants can be found at local nurseries. Cilantro is a member of the carrot family. Due to its taproot, it is best to sow the seeds directly into a bed or container. How Do You Grow Cilantro Plants Grow cayenne pepper by direct sowing seeds 1/4 to 1/2 inch deep in well-drained soil as it does not like transplanting due to its taproot and for continuous harvest, transplant every two to three weeks in full sun or afternoon shade in hot climates. Keep the soil consistently moist. Space the seedlings six inches apart. Harvest within 40 to 45 days. Plant cayenne pepper in an area that receives full sun and has a pH of 6.2 to 6.0. If you live in a warm climate, offer afternoon shade. Improve the soil by adding 1/4 inch of old compost or other rich organic matter. Consider a premium back-potting mix for growing in containers. Also Read: Cactus Key Takeaways To grow red pepper plants at home, you need to follow a few tips, some of which are listed below. Step-by-Step Guide to Growing Cilantro Plants There are many important steps to grow red pepper plants at home, by following which you can easily grow red pepper plants at home and benefit from them for a long time. Those steps are mentioned below. Choose Quality Seeds For high-quality red chillies in Pakistan, choose F1 hybrid seeds for half the yield and fast growth or Paul Neyland OP seeds for reliable flavor. Look for slow bolting broad-leaf varieties like Sanjeta to ensure consistent harvest. Top retailers include Daraz Seed and Apna Agao Seed Sellers. These are reliable sellers who can help you expand your seed varieties and lineage to a great extent. Select the Right Location Choosing the right location for red chillies is a very important process to prevent the plant from going to seed early as it thrives in cool, mild climates. To maintain a healthy leafy crop, the ideal location needs to balance sunlight with temperature control, and location selection is more important than the extremes in the house. Always choose a west or south facing window where it can receive full sunlight. Also Read: How To Grow Rosemary Plants Indoors – Easy Secrets for Fast Growth & Healthy Plants Prepare Well-Draining Soil For plants, use well-drained soil and prepare sandy or loamy soil with two to three inches of peat moss to improve aeration and nutrient content, aiming for a pH of 6.2 to 6.8. For containers, use a light, aerated commercial potting mix with perlite or vermiculite. Plant cayenne pepper in an area that gets full sun and grow cayenne pepper using well-drained soil. If you live in a hot climate, provide afternoon shade and improve the native soil by mixing in an inch of aged compost or other rich organic matter. Plant the Seeds Correctly To successfully grow plants, direct seeding in cool weather is required because the plant has a delicate seedbed that dislikes being moved, and to ensure continuous harvest, plant the plants in rows and use the best method of using them. Sow new seeds every two to three weeks. You can plant your plants one or two inches apart for young shoots. Use a six-inch round pot and place about 10 seeds on top of the soil, then cover them with one centimeter of Seed and cover with a layer of soil. Water Properly Water the red pepper regularly to keep the soil consistently moist but not waterlogged, aiming for about an inch of water per week. Test the soil for moisture every few days, then water when the top inch is dry to prevent bolting and wilting. Water at the base. Always avoid overhead watering to prevent plant diseases. Provide Proper Light To provide adequate light for your red pepper plant, strike a balance that promotes maximum leaf growth while preventing the plant from bolting and flowering at a minimum due to excess heat. Red peppers require six to eight hours of sunlight per day, but prefer cool, indirect sunlight in hot weather. Provide the plant with six to eight hours of direct sunlight per day or choose a south- or west-facing window in your home that receives direct sunlight. Thin and Maintain Plants Once the plants are several inches tall, pinch back the growing tips to encourage branching and bushiness. Cayenne peppers crave moist soil, so check the soil every couple of days and make sure the plants in the beds get about an inch of water per week. Also Read: How To Grow A Pineapple Plant From The Top – Easy Home Growing Trick Harvesting Correctly Cut the outer stems close to the ground and harvest the red peppers when they reach six to 12 inches. The center crown remains to regrow. Never cut more than one-third of the plant at once and for maximum flavor, morning is the best time to harvest and regularly delay bolting. This will help greatly in improving the growth of your plant. Growing Cilantro Indoors vs Outdoors Growing Cilantro Indoors Growing red pepper plants indoors requires a six- to eight-inch deep pot with good drainage and a high-quality potting mix and five to six hours of direct sunlight or 12 to 16 hours of artificial light. Sow the seeds one to four inches deep and keep them moist at a temperature of 60 to 75 degrees Fahrenheit and expect them to sprout in seven to 14 days. When the plants are four to six inches tall, prune the outer leaves and ensure consistent moisture, but always avoid … Read more

How To Grow A Pineapple Plant From The Top – Easy Step-by-Step Guide for Beginners

How To Grow A Pineapple Plant From The Top

Have you ever cut a fresh pineapple and wondered if you could grow a new plant from a small piece of leaf? Many people try to do this, only to be left with a rotting crown that never grows properly. The good news is that it is possible to grow a pineapple plant from the top, even indoors. If you follow the right steps and provide it with proper care, proper preparation, adequate lighting and a little patience, that leftover crown can grow into a healthy plant. In this complete guide, you will learn exactly how to successfully grow a pineapple plant from the top without making any common mistakes. Growing a pineapple plant at home is quite easy, all it takes is a little hard work, patience and steps. If you follow these steps, you can enjoy a nice pineapple.This guide will tell you in detail how to grow your own pineapple plant at home. The good news is that pineapple plants can be grown very easily at home. Most people think that pineapple plants cannot grow at home, so they quickly become disappointed. No need to despair. How Do I Grow A Pineapple Plant From The Top? When you are growing a pineapple plant correctly and it is easy to grow a pineapple plant from the top, start by choosing a fresh, healthy pineapple with strong green leaves. Turn the leafy crown over rather than cutting from the bottom and remove the remaining flesh of the fruit from the base to prevent rot. Peel the lower leaves to expose about an inch of the stem where the roots will form. Next, let the crown dry for a minute or two so that the vine can form root collars. Each step is important because this reduces the risk of fungal infections. Once dry, place the base in a glass or a glass of water. Just cover the bottom. You can plant it directly in well-drained soil. If the roots are in water, change the water every few days and let them grow about two to three inches long before transplanting into the ground. Wait and provide the plant with direct sunlight. Place in a warm spot. Water lightly. Keep the soil fairly moist but never too wet. Root once more if necessary. Will be established in a few weeks and the leaves will grow steadily and under ideal conditions the fruit can be ready in 18 to 24 months. This shows that growing a pineapple plant at home is quite easy and does not require much care. With just a little effort and attention and care, you can easily enjoy a nice and clean healthy strong pineapple and this is a great hobby for you. Also Read: Carduus Key Takeaways Of How do you grow a pineapple plant There are many tips for growing and promoting pineapple plants at home. Just follow their tips. Some of them are as follows: If you follow all the things that have been told to you, you can easily succeed in getting a healthy pineapple. All that is needed is constant care, attention, adequate amount of water and a few other things. After fulfilling these things, you can easily succeed in getting it and it will prove to be very good for you. Step-by-Step Guide to Growing a Pineapple from the Top There are some very important steps to growing pineapple at home. If you follow these steps, you can enjoy a good harvest and fresh pineapple. All those steps are listed below. Choose the Right Pineapple The first step to successfully growing a pineapple plant from the top is to choose a healthy, ripe fruit. The choice of fruit also has a great impact on its healthy growth. Look for a pineapple with strong green leaves that are not dead or damaged at the ends. Avoid fruit that shows signs of rot or excessive soft spots, as these can indicate disease that can spread to the crown. Choose a pineapple that feels heavy for its size and has a fresh aroma at the base. The crown should be firm and should not be damaged during handling or transportation. Starting with a strong, healthy sapling increases the chances of successful rooting and a strong plant that can eventually produce fruit. And if you want to grow pineapple seedlings, choose a pineapple of the best breed that is free from any disease so that your pineapples will not be affected. Remove the Crown Properly Removing the pineapple crown properly is essential to prevent damage and increase the chances of successful growth. Many people start by twisting the children from the top instead of cutting from the bottom because twisting protects the base where the roots will form. If twisting is difficult, you can use a sharp, clean knife to cut the flesh of the fruit just above the top, leaving about half an inch of the stem attached to the crown. Removing the pineapple crown properly is essential to prevent damage and increase the chances of successful growth. Instead of cutting too far down, start by twisting the leaves from the top because twisting protects the base and will form roots. If twisting is difficult, you can use a sharp, clean knife to cut just above the flesh of the fruit, leaving about half an inch of the stem attached to the crown. This will encourage your plant to grow very well and enjoy it. Remove Lower Leaves After separating the crown from the pineapple, the next step is to remove the lower leaves at the base. Remove about an inch or two of the stem with a pruner and optionally remove two to three layers of leaves where the roots will grow. It is important to expose this part of the stem because it allows the plant to be removed more easily from the roots and reduces the risk of rot. Be gentle to avoid damaging the crown and make sure that … Read more

How To Grow Banana Plants Indoors – A Simple Guide to Growing Banana Trees at Home

How To Grow Banana Plants Indoors

Growing banana plants indoors requires a sunny, warm, and humid environment. Preferably near a south-facing window. Use a well-drained, nutrient-rich potting soil, such as a mix of compost and perlite, and water frequently to keep the soil moist. Growing banana plants indoors is considered very easy. All it takes is a little effort, attention, and following the steps.Now the question is, is it possible to grow a banana plant at home? The answer is yes, absolutely. It is possible to grow a banana plant at home and it survives for a very long time as long as it gets adequate light and moisture. This continues to prove beneficial. How To Grow Banana Plants Indoors Successfully To successfully grow banana plants indoors, choose a variety like Moss Dwarf or Kevin Dish and provide 12 to 16 hours of bright light per day and maintain a temperature of 65 to 80 degrees Fahrenheit for optimal growth. They need consistent humidity, water frequently daily, maintain a high humidity of about 60 to 90 percent, and fertilize biweekly during the growing season. For good growth and yield, the crop requires a balanced fertilizer such as 10:10 NPK ratio. Nitrogen is essential for early growth and potassium promotes disease resistance and flower development, which is very effective for early plant growth. Also Read: Grape Key Takeaways There are many tips for growing banana plants at home, which if understood well can be very beneficial to you. Here are a few of them: Understanding Banana Plants Indoors Banana plants may look like trees, but they are actually large herbs with a soft, woody stem, like a siu siu stadium. Indoors, they grow with broad, dramatic leaves that grow straight up and down, and can quickly become the centerpiece of any room. However, their nature means that they require specific conditions to stay healthy, primarily strong light, warmth, and fairly low humidity. When grown indoors, banana plants generally focus on producing green foliage rather than fruit. Fruiting is possible, but it requires consistent feeding and plenty of space for the plant to mature. Even without bananas, indoor plants can be impressive, beautiful, and grow quickly when properly cared for. This is a great and exciting hobby that you will enjoy a lot. Best Banana Varieties for Indoor Growing There are many types of banana plants, but some types are very good for growing at home. All of them are listed below. These are the types of banana plants that you can easily plant at home, which will give you good results and fruits after a little effort. With this, you can easily use them to enhance the beauty of your home and get good bananas with proper effort and attention. Step-by-Step Guide to Growing Banana Plants Indoors There are many basic steps to grow banana plants at home. If you follow these steps, you can easily grow a banana plant in your home, which will add to the beauty of your home. Those steps are listed below in more detail. Choose the Right Variety The best types of banana plants for indoors are compact and ornamental varieties that thrive in pots and warm sunny conditions. All Angels Choice includes Draft, which grows to about six to eight feet tall, and Cane Dish, Super Draft, which grows to about three feet tall, and Trillidini, another type of banana plant that grows to about two to three feet tall. These include all of these, which can produce edible fruit and are ideal for fast-growing plants. Choose a seasonal tribe and choose a plant type that is adaptable to your environment and your current needs. Also Read: How To Grow Rosemary Plants Indoors – Easy Secrets for Fast Growth & Healthy Plants Select a Large, Stable Container To successfully grow banana plants indoors, choosing a large and sturdy container is essential due to their fast-growing and extremely heavy nature. Mature indoor plants require containers that have a capacity of about 15 to 25 gallons. To accommodate the extensive root system, the pot should ideally be 20 to 24 inches deep and 20 to 25 inches wide. For growing a typical banana plant indoors, the right choice of container plays a major role in the optimal growth of the banana plant. Use Rich, Well-Draining Soil Banana plants require rich, well-draining soil that is consistently moist but never waterlogged. The ideal soil for bananas should be loose and nutrient-rich, with a pH between 5.5 and 7.0. Since they are rot-tolerant, they benefit from a soil amended with plenty of organic matter, such as compost or well-rotted manure. Banana plants require rich, well-drained soil. Water deeply and regularly, but avoid overwatering your banana plant or allowing the soil to become waterlogged, which can lead to root rot. Provide Proper Light Banana plants need bright sunlight to thrive. They typically need six to eight hours of direct sunlight per day. They are sun-loving plants that grow fastest in full sun, although they can tolerate partial shade. Most varieties of banana tree plants prefer to grow in full sun, meaning they need at least six hours of direct sunlight most days. However, the more sunny varieties can burn quickly and do better in a spot with plenty of indirect light in partial shade. They tolerate indirect light levels better than a minute dish of moss in front of them. Water Correctly Banana plants need deep watering to keep the soil moist but not waterlogged as they are 80 percent water sensitive to root rot. Water daily two to three times a week in hot and growing seasons and reduce the frequency to one to two times a week in winter. Pay attention to watering at the base to avoid leaf disease and they prefer moist soil but not waterlogged soil as over watering can rot the roots and water the plants deeply allowing the water to penetrate the soil and prevent re-watering.First, wait for the top two and a half centimeters of soil to … Read more

How To Grow Rosemary Plants Indoors – Easy Steps to Grow Fresh Rosemary at Home

How To Grow RoseMary Plants Indoors

To grow rosemary indoors, place it in a bright south-facing window for eight to six hours of direct sunlight per day and use a well-draining sandy potting mix in a pot with drainage holes. Use a water-resistant mix. Water only when the top inch of soil is completely dry. Watering is usually done weekly and maintaining the temperature between waterings is straightforward. Choose a pot that is large enough for your plant and if you are moving your plant from the garden to an indoor houseplant for outdoor rooting, the pot you choose should be larger than the size of the houseplant. How To Grow Rosemary Plants Indoors Successfully To successfully grow a Rosemery plant indoors, place it in a sunny south-facing window with six to eight hours of direct sunlight per day. Use a pot filled with sandy, well-draining potting mix. Provide good drainage. Water only when the top soil is completely dry. Keep the temperature between 15 and 20 degrees Fahrenheit. It is relatively easy to grow and is a good choice for any home herb garden. Its sharp flavor and pine-like aroma make fennel a popular ingredient in cooking, and the upright variety is excellent for both fresh and dried use. Key Takeaways There are many takeaways for growing rosemary plants at home, some of which are as follows: Also Read: How To Grow Potato Plants Indoors – Easy Step-by-Step Guide for Big Harvests Understanding Rosemary’s Natural Growing Conditions There are certain natural conditions for the full growth of the rosemary plant. It is very important to understand these conditions. Those conditions are as follows: Mediterranean Climate Explained Rosemary thrives in a climate characterized by hot, dry summers and mild, wet winters. It requires six to eight hours of full sun per day, well-drained sandy or loamy soil with a pH of 6.2 to 7.5, and low humidity. A drought-tolerant evergreen, it grows best in zones seven to ten in warm temperate regions. Fragrant sun-loving rosemary is a type of rosemary native to the Mediterranean. It’s no wonder rosemary is otherwise known as the Wonder Herb. It’s an excellent choice for adding flavor and aroma to cooking, decorating sunny garden borders, and even improving memory. Why Indoor Conditions Can Be Challenging The indoor environment is often the opposite of what the plant naturally prefers. Most homes cannot provide enough direct sunlight, especially during the fall and winter months, and can cause weak leg development. Air circulation is also limited indoors, which increases the risk of fungal and other diseases. In addition, many people accidentally overwater their plants, and they are especially sensitive to wet soil. Heating systems in the winter and air conditioners in the summer can further stress the plant by creating dry or inconsistent temperatures. Since the rose is developed in bright, airy, and well-drained conditions, it struggles when the basics are not met. Adjust your indoor setup so that the plant can adapt to its home climate and what it will experience outside. Step-by-Step Guide to Growing Rosemary Indoors A few things and steps are essential for the regular growth of a rosemary plant. If these steps are followed, your plant will give you good results. Those steps are Follows. Choose the Right Rosemary Variety Choosing the right rosemary plant variety will have a positive impact on your plant. Choosing the right variety for growing indoors makes it easier. Some varieties are large and woody, which can quickly outgrow containers and make it difficult to manage indoors. For best results, choose varieties that stay small and adapt well to pots. Blue Boy Arab and other complex upright varieties are generally more manageable for indoor spaces. The latter varieties can also work in hanging baskets, but they need to be watered more often and require more light and attention. Whenever possible, buy a healthy nursery-grown plant rather than starting from seed, as rosemary seeds can be slow and unpredictable. Choosing the right variety will help you from the start and provide a strong foundation. It increases your chances of long-term success indoors. Just give your plant a little attention and it will be a great addition to your home. It will also enhance the beauty and provide you with a great enjoyment and interesting hobby. Also Read: Magnolia acuminata Select the Proper Container The choice of container in which to grow rosemary indoors also has a big impact. Proper container selection is essential. Always use a pot with drainage holes because the roots inside cannot stand sitting in water, and terracotta pots are often a great choice because they allow excess moisture to evaporate more easily, helping to prevent overwatering problems. Choose a container that is slightly larger than the plant’s root ball. A pot that is too large can hold too much moisture, while a pot that is too small can hold too much moisture. A pot that is about 12 to 18 inches wide is usually the right size for a small to medium plant. Proper drainage provides plenty of room for the roots to grow and creates a solid foundation for long-term success. Choosing the right container can have a huge impact on your plant’s growth. Always use a pot that is deep and has drainage holes. Use the Right Soil Mix If you want a good rosemary plant at home, always choose the right soil. Never use garden soil to grow the plant. Always use light, well-drained, fertile soil, which is very helpful in enhancing the growth of the plant.Rosemary plants need soil that drains quickly and doesn’t stay wet for long. Regular potting soil alone often contains too much moisture, which can lead to root rot. For best results, use a well-draining mix designed for herbs, whether acidic or alkaline. You can also improve standard potting soil by mixing in sand or light loam to increase drainage and air flow around the roots. Always avoid potting soil because it shrinks in a container with a layer of water, and … Read more

How to Grow Indoor Bamboo Plant – Simple Tips for a Healthy Bamboo in Your Home

how to grow indoor bamboo plant

Indoor bamboo and this keyword keyword also varies a bit, especially for Lucky Moss or similar plants. It grows best in temperatures between 60 and 75 percent relative humidity, bright indirect light, high humidity, and constant moisture but not wet. Well-drained soil: 1/3 soil: 1/3 peat: 1/3 perlite or pebbles. Change the water weekly. Use filtered water and add a small amount of fertilizer. This will help the plant grow well.Design for Generalship Under ideal conditions, shoots emerge within the first two to three months and grow rapidly. Full height and diameter are usually reached by six months. Between 6 and 12 columns become hard and mature. How to Grow Indoor Bamboo Plant (Beginner-Friendly Guide) Growing bamboo indoors, especially lucky bamboo, is a beginner-friendly process because the plant is extremely resilient, thrives in low light, and can be grown in just water. Growing bamboo indoors can be difficult, but lucky bamboo offers the same charm that is often used in feng shui to bring prosperity. Versatile placement: They can be grown in water or soil and fit well into any interior setting. Aesthetic appeal: With its simple, clean lines, the bamboo creates a sense of calm and beauty in any room. Key Takeaways – Indoor Bamboo Care at a Glance Below are some of the Key Takeaways that you can use to grow bamboo indoors: Also Read: How To Grow Rosemary Plants Indoors – Easy Tricks for a Fresh, Fragrant Herb All Year Types of Bamboo Plants You Can Grow Indoors Lucky Bamboo (Dracaena sanderiana) Lucky bamboo (Dracaena centriana) is a popular low-maintenance plant of the family Baraceae, native to West Africa. It is able to tolerate both water and soil and thrives in bright indirect light and warm, humid conditions. It is commonly used in feng shui and to bring positive energy and good luck. Lucky bamboo is a type of bamboo plant that is grown outdoors. True Bamboo Varieties for Indoors True indoor bamboo varieties include clump-forming varieties that can handle low light and dry air, such as multiplexes, especially Alphonse, Bombay, Vendreau, Cosa, Buddha’s belly, and Paleo plants. These thrive in bright indirect light, require consistent moisture but not too much soil, and benefit from high humidity, making them excellent non-invasive and a good choice for containers. Which Bamboo Is Best for Beginners? The best bamboo for beginners is usually clumping bamboo, especially for cold climates like Farza for colder climates or Bambusa for warmer climates because it grows in manageable clumps and is not invasive unlike running bamboo which can spread uncontrollably. Clumping types grow slowly outwards and are ideal for privacy screens and containers. Look for the creeping buffalo that can grow there. You can grow a very solid screen in just a few years that won’t spread at all. I agree that stick with bamboo. It will still fill in and provide a privacy screen but won’t be a problem for you. Step-by-Step Guide – How to Grow Indoor Bamboo Plant Successfully Step 1 – Choosing a Healthy Bamboo Plant Signs of a healthy bamboo stalk What to avoid when buying bamboo When buying a bamboo plant, it is important to avoid signs of poor health that could lead to problems later. Always stay away from plants with yellow or pale stems as healthy bamboo should be bright green and vibrant. The stem should feel firm and not soft or mushy which could indicate wilting. Check the leaves carefully. Avoid plants with brown spots or curled leaves as these are signs of stress or damage. If growing in water, make sure the water is clean and not cloudy or smelly. Step 2 – Selecting the Right Container Glass containers vs pots with drainage When growing a bamboo plant indoors, choosing between a glass pot and a ceramic pot depends on how you plan to grow it, either in water or in soil. Glass pots are most commonly used for lucky bamboo grown in water. They are easy to maintain and allow you to see the roots, which helps you monitor the health of the plant. However, the water should be changed frequently to prevent mold and bacteria buildup. On the other hand, pots with drainage holes are ideal for bamboo grown in soil. These pots allow more water to drain out, which prevents the roots from rotting and keeps the soil from becoming soggy. Bamboo grown in soil is generally faster and stronger because it gets more nutrients. Although pots may require a little more attention with watering, they provide a more natural growing environment. In short, glass pots are great for a low-maintenance, decorative setup, while pots with drainage holes are better for long-term growth and healthy roots. Ideal container size for indoor bamboo Choosing a pot for growing beans at home is also very important because the plant grows properly and well in a proper pot. If you choose a small pot for growing beans indoors, the roots will not be able to spread, which can cause the plant to rot. If you choose a larger pot, water can accumulate in it and the roots can rot, which can cause the plant to die. That is why you have to choose the pot very carefully. You have to choose a pot that is about 1 to 2 inches wide, because it is best for the roots.Your pot for growing bamboo plants should be about 6 to 8 inches long, in which your bamboo plant can grow indoors. Step 3 – Water or Soil? Choosing the Best Growing Medium How to grow bamboo in water indoors You can grow your bamboo plant in water indoors or outdoors. You can grow bamboo in offices. Bamboo plants grow very well underwater. For this, you need clean water or filtered water. You have to grow bamboo plants in it. Bamboo plants grow green and very well underwater. The lucky variety of bamboo grows underwater and this variety grows very beautifully underwater, which you can enjoy. … Read more

How To Grow Rosemary Plants Indoors – Easy Tricks for a Fresh, Fragrant Herb All Year

How To Grow Rosemary Plants Indoors

To grow rosemary indoors, place it in a south- or east-facing window for six to eight hours of direct sunlight per day and use a well-draining pot with a sandy potting mix. Water only when the top inch of soil is dry to prevent root rot. Keep it in a cool, dark place at 75 degrees Fahrenheit from the start and prune regularly to encourage vigorous growth. Growing rosemary indoors is straightforward. Choose a pot that is a good size larger than your plant. If you are moving the plant from an outdoor herb garden to an indoor houseplant, the pot you choose should be larger than the pot for the size of the houseplant. How To Grow Rosemary Plants Indoors Successfully To successfully grow a dhoni plant indoors, place it in a sunny south-facing window with six to eight hours of sunlight and use a well-drained pot with sandy, quick-draining soil. Water only when the top of the soil is dry. Avoid overwatering. Provide it with at least six to eight hours of light per day. If natural light is not sufficient, grow lights can provide the required light intensity. This is quite beneficial. Also Read: Berry Key Takeaways There are many takeaways for growing rosemary plants at home, some of which are as follows: Understanding Rosemary’s Natural Growing Conditions There are certain natural conditions for the full growth of the rosemary plant. It is very important to understand these conditions. Those conditions are as follows: Mediterranean Climate Explained Why Indoor Conditions Can Be Challenging The indoor environment is often the opposite of what the plant naturally prefers. Most homes cannot provide enough direct sunlight, especially during the fall and winter months, and can cause weak leg development. Air circulation is also limited indoors, which increases the risk of fungal and other diseases. In addition, many people accidentally overwater their plants, and they are especially sensitive to wet soil. Heating systems in the winter and air conditioners in the summer can further stress the plant by creating dry or inconsistent temperatures. Since the rose is developed in bright, airy, and well-drained conditions, it struggles when the basics are not met. Adjust your indoor setup so that the plant can adapt to its home climate and what it will experience outside. Step-by-Step Guide to Growing Rosemary Indoors A few things and steps are essential for the regular growth of a rosemary plant. If these steps are followed, your plant will give you good results. Those steps are Follows. Choose the Right Rosemary Variety Choosing the right rosemary plant variety will have a positive impact on your plant. Choosing the right variety for growing indoors makes it easier. Some varieties are large and woody, which can quickly outgrow containers and make it difficult to manage indoors. For best results, choose varieties that stay small and adapt well to pots. Blue Boy Arab and other complex upright varieties are generally more manageable for indoor spaces. The latter varieties can also work in hanging baskets, but they need to be watered more often and require more light and attention. Whenever possible, buy a healthy nursery-grown plant rather than starting from seed, as rosemary seeds can be slow and unpredictable. Choosing the right variety will help you from the start and provide a strong foundation. It increases your chances of long-term success indoors. Just give your plant a little attention and it will be a great addition to your home. It will also enhance the beauty and provide you with a great enjoyment and interesting hobby. Select the Proper Container The choice of container in which to grow rosemary indoors also has a big impact. Proper container selection is essential. Always use a pot with drainage holes because the roots inside cannot stand sitting in water, and terracotta pots are often a great choice because they allow excess moisture to evaporate more easily, helping to prevent overwatering problems. Choose a container that is slightly larger than the plant’s root ball. A pot that is too large can hold too much moisture, while a pot that is too small can hold too much moisture. A pot that is about 12 to 18 inches wide is usually the right size for a small to medium plant. Proper drainage provides plenty of room for the roots to grow and creates a solid foundation for long-term success. Choosing the right container can have a huge impact on your plant’s growth. Always use a pot that is deep and has drainage holes. Use the Right Soil Mix If you want a good rosemary plant at home, always choose the right soil. Never use garden soil to grow the plant. Always use light, well-drained, fertile soil, which is very helpful in enhancing the growth of the plant.Rosemary plants need soil that drains quickly and doesn’t stay wet for long. Regular potting soil alone often contains too much moisture, which can lead to root rot. For best results, use a well-draining mix designed for herbs, whether acidic or alkaline. You can also improve standard potting soil by mixing in sand or light loam to increase drainage and air flow around the roots. Always avoid potting soil because it shrinks in a container with a layer of water, and the goal is to create a light, loose soil structure that dries out a little between waterings. As long as the roots have access to air, they don’t sit constantly wet. It grows strong and stays healthy indoors forever. If you want a healthy plant to add to the beauty of your home, choosing the right soil for the plant is also essential. Provide Proper Light To grow rosemary indoors and for proper growth, it needs adequate sunlight. Light is the most important factor when growing indoors. The herb needs at least six to eight hours of direct sunlight per day to be fully fragrant and healthy. Place your plant near a south-facing window where it can get the brightest light. If … Read more