How To Grow the Sunflower Plants – 7 Powerful Secrets to Grow Huge, Bright Sunflowers at Home

How To Grow the Sunflower Plants

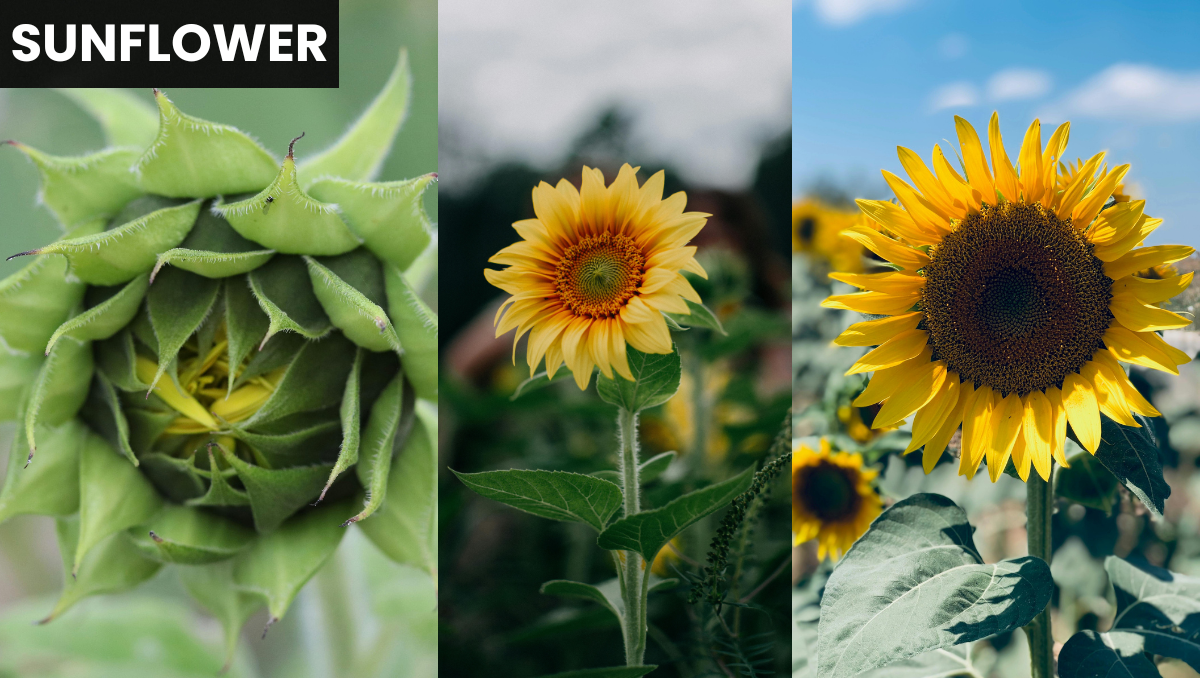
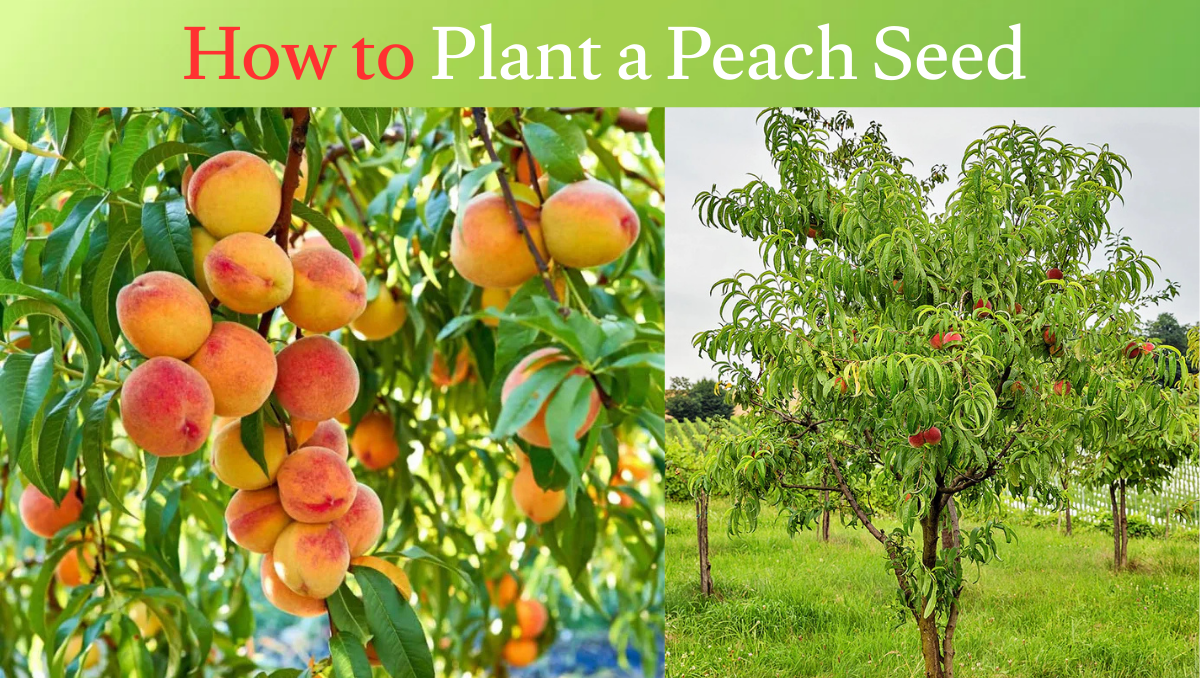
Sunflower plants are mainly cultivated in European and Asian countries. Sunflowers are one of the country’s favorite flowers. They are very famous for their yellow color, although in addition to yellow, they can also be grown in green, red, and white. Everyone wants to grow sunflowers in their homes for their beauty, but many people get frustrated due to many difficulties. With a little effort and attention, you can easily grow a sunflower plant at home and enjoy its colorful and attractive flowers. We will give you a complete guide on how you can easily grow a sunflower plant in your home and enjoy its beauty. Key TakeAways How To Grow Sunflower Plants You can easily grow sunflowers indoors. To grow sunflowers, plant the seeds one to two inches deep in well-drained soil in the spring after the last frost, making sure they get six to eight hours of direct sunlight each day. Space the plants six to eight inches apart for short varieties and 30 inches apart for tall varieties. If you are growing sunflowers in pots, we recommend starting them in pots in March or early April. Fill a 3-inch pot or slightly larger with peat-free compost. Place one seed per pot in the compost, about a centimeter deep, and then cover with water. Also Read: The Versatile Fern Understanding Sunflower Basics Before Planting There are many basic steps to grow sunflower plants indoors and outdoors. If you understand these basic steps easily, you can easily enjoy a good harvest at home. There are some basics that are helpful in growing the plants, which are as follows: Types of Sunflowers (Choose the Right Variety) Choosing the right type of sunflower will be extremely helpful in growing and improving the growth of your sunflower plant, whether indoors or outdoors, as different varieties grow to different heights and serve different purposes. Here are the main types that you should consider. Below are all the types. Giant Sunflowers Giant Sunflowers This variety can grow to about 8 to 12 inches tall and can produce flower spikes. It is perfect for open areas in gardens where you want a dramatic look and this variety is very effective for growing outdoors in open gardens. Dwarf Sunflowers Dwarf sunflowers are a type of sunflower plant that grows from one to three feet tall and is ideal for containers, pots, and small gardens. They are easy to manage and are perfect for beginner gardeners to grow indoors. Multi-branched Sunflower plants Multi-branched plants are a type of sunflower. Instead of one large flower, they produce small fruits on each plant, making them perfect for continuous flowering and bouquets. This is a very attractive type of plant. Pollen-Free Sunflowers Pollen-free sunflowers are a type of sunflower that has been specially bred for indoor arrangements. These varieties do not leave behind pollen, keeping you clean and tidy, so they are considered a very useful variety to grow indoors. Colored or Decorative Varieties Colorful or ornamental varieties are considered a very good variety of sunflower plants because they come in shades of orange, bronze, or two-tone petals that add a unique beauty to your garden and are also very helpful in enhancing the beauty of your home. Best Time to Plant Sunflowers The best time to plant sunflowers is in the spring, usually April to May, once the danger of frost has passed and temperatures are at their lowest in May. For consistent play, you can plant them in two to three weeks until early summer. How Long Do Sunflowers Take to Grow? BBC Sunflowers generally take 80 to 120 days to grow from seed to maturity, about three to four months, although some fast-flowering varieties bloom in 55 to 70 days, and they usually sprout within seven to 14 days and reach full height in about three months. Also Read: How to Plant a Peach Seed – Easy Step-by-Step Guide to Grow a Peach Tree Step-by-Step Guide How To Grow the Sunflower Plants There are many steps to grow a sunflower plant indoors or outdoors. If you follow all of them, you can enjoy a good and beautiful harvest and reap the benefits. Those steps are explained below. Select High-Quality Seeds While buying seeds, keep the following things in mind: never use damaged or hybrid ones and buy seeds from a reliable supplier, and also buy them by confirming the labeling and expiration date so that you do not face any problem later and always use high-quality seeds. Prepare the Soil Properly For the best growth of sunflower plants, make sure to always choose good light and fertile soil that is rich in nutrients as sunflower plants thrive in rich nutrient soil and loosen the soil to a depth of 10 to 12 inches to remove any weeds, stones or debris stuck to the roots. This helps the plant grow quite quickly and helps the plant fill in quickly. Plant Seeds at the Correct Depth For the best growth of sunflower plants, planting them correctly is very important and plays an important role. For strong plants, it is important to plant them at the appropriate depth. Plant the plants about one inch to two and a half centimeters deep in the prepared soil. Planting them too deep can prevent them from growing. Plant the seeds six to 12 inches apart, depending on the appropriate variety and to allow them enough space to withstand the elements. Water Properly After Planting To ensure full growth of sunflower plants, the right amount of water must be provided at the right time. Be especially careful about the amount of water.During these early stages of growth and development, the soil should be kept moist but not waterlogged. Water sunflowers once established. Provide occasional weekly watering, about one inch per week, deep near the base. Ensure a strong, deep root system and water container plants more frequently in hot weather. This will be sufficient for the plant. Fertilize at the Right Time Timely … Read more

How to Plant a Peach Seed – Easy Step-by-Step Guide to Grow a Peach Tree

How to Plant a Peach Seed

Growing Peach seeds from seedbeds is a rewarding, multi-month project that requires patience because it involves simulating winter conditions to break the seed’s top layer, whereas you can plant the seeds directly in the ground. For a higher success rate, you should clean, dry, and refrigerate the seeds for eight to 12 weeks before planting. By mimicking the refrigerator and winter conditions, urad trees arrive in your yard with ripe urads. Fruit trees, such as apricots and plums, are ideal candidates for growing from seed. You only need a locally grown urad variety and the right planting holes. Proper seed preparation and planting techniques are critical to successful seed establishment, but with the right location and basic care, young urad plants will grow quickly. Everything you need to know about growing delicious urads from seed is here for you. Key Takeaways (Quick Answer Section) Also Read: Rose How To Plant A Peach Seed (Step-by-Step Guide for Beginners) Step 1 – Choose the Right Peach Seed Not all varieties of Peach grow well indoors, so choosing the right variety is important. Always use ripe Peach and fresh Peach. Avoid using old, dried, or spoiled Peach. If possible, choose Peach from local or organic sources, as some store-bought Peach are treated or hybrid varieties do not grow at all. Step 2 – Clean and Dry the Seed Properly Cleaning and drying the urad seeds is very important to prevent them from rotting.After eating the Peach, remove any remaining flesh from its surface. Even small pieces of pulp can rot and inhibit germination. You can gently rinse the urad under running water. If necessary, use a soft brush to clean it thoroughly.The shell should be allowed to dry before storing or installing them, usually in preparation for the cold stratification process. Step 3 – Crack the Peach Pit (Optional but Recommended) To sow the seeds of the Peach plant, gently open the hard outer shell of the urad pit to extract the seed from inside. This helps it to germinate quickly, always taking care not to damage the inner part.This is a recommended step to increase the rate when growing the urad tree. The actual seed looks like an almond from the inside. Step 4 – Cold Stratification (The Secret to Germination) Peach seedlings need a cool period to germinate, or they grow at room temperature. They need 3 to 6 weeks of warm temperatures to start. So, wrap your peach seeds in a damp paper towel and store them in the refrigerator for 6 to 10 weeks. Once you see a small root emerging, the seeds are ready to be planted. Lift them out and plant them one to two inches deep in the soil. Step 5 – Planting the Peach Seed To grow a Peach tree from seed, clean and dry the pits. Crack them open to remove the inner seeds and refrigerate in a baggie of damp paper towels for eight to 12 weeks. Plant them one to three inches deep in well-drained soil in full sun and provide consistent moisture. Fruiting is expected in over three years. Step 6 – Watering and Initial Care Providing too much water can cause the urad plant to wilt or reduce its growth, so avoid overwatering your urad plant. When the soil of the Peach plant feels dry, moisten it with a light watering and make sure that the pot in which the Peach plant is planted has holes for water flow. Step 7 – Provide Sunlight and Warmth For optimal growth, a pomegranate plant must receive at least six to eight hours of direct, unfiltered sunlight per day. A pomegranate tree is a sun worshipper and requires high-intensity light to increase fruit production and prevent disease. Step 8 – Transplanting the Seedling When your tree is a few days old and has strong leaves, it is ready to be transplanted outside into a larger pot. Harden it off by exposing it to harsh outdoor conditions for a week, then plant it in well-drained soil with plenty of sunlight so that its growth does not stop. Also Read: How to Grow Lavender Plants: Expert Tips for Gorgeous, Fragrant Blooms Indoors & Outdoors Best Soil and Pot for Growing Peach Trees Plant the urad grove in a container at least 18 to 24 inches wide and deep. Use a well-drained, slightly acidic soil (pH 6.0 to 6.5) mixed with a good quality potting soil mixed with light or compost. Plastic pots are easy to move, while ceramic provides stability and both should have good drainage holes to prevent root rot. How Long Does It Take for a Peach Seed to Grow? The Peach plant is a very slow growing plant, so it requires patience to grow it. Usually, it depends on the temperature and care.A Peach seed usually takes three to five years to grow into a tree that bears fruit, some trees take up to eight years. The seeds require a period of cool, moist soil of one to three months for germination, after which the seedlings are planted in well-drained soil in full sun. Can You Grow a Peach Tree Indoors? Now the question is whether Peach plants can be grown indoors. The answer is yes, you can grow urad trees indoors, but it requires specific care, especially choosing dwarf self-pollinating varieties like Bonans or Pixies, ensuring six to eight hours of direct sunlight and providing a dormant period, using well-drained soil in containers, and repotting after two to three years and hand-pruning the flowers. Common Mistakes to Avoid When Planting a Peach Seed Mistakes you need to avoid when growing peach plant: Pro Tips to Grow a Peach Tree Faster To grow a Peach plant, you need to use a cool surface and the pot should be broken with care to grow the plant. You need about six to eight hours of sunlight a day to plant quickly. You need to use a pot with good drainage holes. Regular pruning … Read more

How To Grow Lotus Plants Indoors: Easy Tips For Stunning Indoor Water Gardens

How To Grow Lotus Plants Indoors

You can grow yams indoors by choosing a dwarf variety, using clay soil, placing the tuber in a wide bowl-shaped container without drainage holes, and providing six to eight hours of bright sunlight or high-powered LED grow lights per day. Keep the water temperature between 75 and 87 Fahrenheit.Change the water regularly to prevent wilting and fertilize in the summer. Lotus can be grown in a variety of ways, from free-standing hairs in your fingers to a pond in your home garden or a large pond on your property.Keep lotus away from flowing plants or springs. How To Grow Lotus Plants Indoors Recreate a natural environment to grow a lotus plant at home. Even without a pond or small bowl, start by choosing these types of lotus that are good for container growing. Use a large, real pot with drainage holes. Fill the pot with soil or potting soil and expose the growing tip. Gently tilt the pot upwards and pour two to four inches of room-temperature water over the soil. Provide six to eight hours of direct sunlight for your plant to grow best.To grow a lotus plant indoors, the temperature should be between 70 and 90 Fahrenheit. Also Read: How Do I Grow An Onion Plants Indoors – Easy Step-by-Step Guide for Beginners (Fast Results!) Key Takeaways There are many major takeaways for growing a lotus plant indoors, by following which you can easily grow a beautiful plant. These are the key takeaways: Step-by-Step Guide How To Grow Lotus Plants Indoors There are many easy ways to grow a lotus plant indoors. If you follow these methods, you can easily enjoy a beautiful lotus plant indoors. They are all Are Given Below. Choose the Right Container Now the question is how to grow kohlrabi in a container. The answer is to choose a wide, shallow and watertight container with no drainage holes for growing the lotus plant because they need space to fill their tuberous roots horizontally. Ideal pots are 18 to 36 inches wide and 12 to 18 inches deep and often use a round plastic resin or glazed ceramic material to hold the water. Smaller varieties of bowl lotuses need a minimum of 10 to 12 inches wide. Prepare the Soil Properly Proper soil preparation for lotus plants requires a heavy, dense medium that anchors the plant and provides nutrients without being too watery. The ideal medium is heavy clay or specially formulated potting soil, as traditional potting media is too light and can degrade water quality. Planting Lotus Tubers Correctly In early spring, plant the lotuses horizontally with the growth tips pointing upwards in a shallow, non-perforated container filled with a heavy potting soil or potting mix. Submerge the tips in two to four inches of water and place in full sun for six to eight hours or more. Maintain a warm water temperature of 70 to 85 degrees for successful growth. Adding Water the Right Way Adding water to lotus plants, especially when growing in a container or bowl setup, requires a more careful approach that keeps the plant moist while it is still young without overwhelming the leaves. Lotus thrives in standing warm water, usually three to four inches above the ground initially, rising to six to 12 inches as the plant matures. Second, lotuses are water plants and if you are growing them in a pot or bowl, make sure you keep the water level about five centimeters above the soil, but do not let the leaves submerge. It is fine to use regular tap water. Providing Proper Light Lotus plants need six to eight hours of direct sunlight daily for optimal growth and especially to prevent weak-legged or spindly plants. The pot should be kept in shallow water, not deep, and away from acids. Also Read: How to Grow Lavender Plants: Expert Tips for Gorgeous, Fragrant Blooms Indoors & Outdoors Fertilizing at the Right Time Fertilize lawns during peak growth for best growth. Early spring for general growth and early summer for lawns to strengthen roots. Ideal conditions are calm, overcast days with temperatures between 50 and 85 Fahrenheit. Avoid heavy rain and midday heat.Always fertilize the soil, never in drought conditions.Always fertilize the soil, never in drought conditions. Ongoing Care & Maintenance Ongoing care for a lotus plant includes ensuring it receives as much sunlight as possible, maintaining a consistent water level, and regular fertilization during the growing season, as well as specific procedures for extreme cold. Lotus plants are vigorous sun-loving perennials that require at least six hours of direct sunlight per day to bloom. Water temperatures are preferably between 75 and 90 Fahrenheit. How Long Does It Take for Lotus to Bloom Indoors Now the question is how long does it usually take for a lotus plant to grow indoors, the answer is that a lotus grown indoors from seed usually takes three to four months to bloom. The flowers usually bloom from mid-summer to early fall. Although some may bloom in the first year, it is common for the plants to focus on establishing tubers, which will result in blooming the second year. They need more than six hours of direct sunlight per day, warm temperatures and temperatures between 75 and 85 degrees, and regular feeding is also required. Common Problems When Growing Lotus Indoors Many people face many mistakes while growing a lotus plant at home and they fall prey to many common mistakes and those same common mistakes cause their disappointment. Below are all the mistakes that are very important to avoid when growing a lotus plant at home. By avoiding the mistakes mentioned above, you can easily grow a beautiful lotus plant at home, which will greatly help in enhancing the beauty of your home. All it takes is a little care, hard work, and dedication. Also Read: Ziziphus mauritiana Common Mistakes to Avoid While growing a lotus plant at home, many people face many difficulties and make many mistakes, and then later … Read more

How to Grow Lavender Plants: Expert Tips for Gorgeous, Fragrant Blooms Indoors & Outdoors

How to Grow Lavender Plants

Now the question is, what is the secret to growing a lavender plant? Lavender needs full sun with good drainage. It is more likely to die from excessive moisture than from cold in the winter. A pot is a great way to provide drainage, although the entire plant will be more vulnerable to cold temperatures than in the ground. And most lavender plants do not thrive in the ground and in very humid or cold weather, although English lavender can tolerate some cold weather. Most varieties are hardy from zones five to nine. How To Grow Lavender Plants (Complete Beginner’s Guide) Lavender, with its fragrant flowers and endless uses, proves to be a total game-changer plant for your garden or hair salon, with its eye-catching appearance proving to be a secret weapon for your entire liner’s wellness routine.Its cooling vibes can help you relax and sleep better, which is essential for your self-care regimen. You can even use it to make refreshing sprays or soothing bath salts, whether you’re into self-care, creating a peaceful home, or just enjoying your natural beauty. Also Read: Morus (plant) Key Takeaways (Quick Summary for Fast Readers) Below are some Key Takeaways for fast readers: Understanding Lavender Plants Before You Start Types of Lavender Plants The main varieties of lavender plants include English, (Sweetest, Hardy, London), Large, (Oily, Hybrid, Pawnee, Rabbit Ear), and French, with toothed leaves and a light fragrance. They require full sun and good drainage. They are harvested annually and all varieties are cultivated for their pure fragrance and fragrance. Best Climate for Lavender The best varieties of linden for summer The best climate for linden in the garden is a room-like environment with hot, dry summers, mild winters, and six to eight hours of direct, full sunlight per day. They thrive in zones five to nine in dry, sandy or rocky soil with low moisture and prefer temperatures between 18 and 30 degrees Celsius to prevent rot. Indoor vs Outdoor Lavender Growth Growing lavender plants both indoors and outdoors has its own characteristics. Growing Lavender Indoor Indoors, it requires six to eight hours of maximum sunlight or LED grow lights, very well-drained soil, and occasional watering when the top inch or two is dry. Use a pot with drainage holes, preferably terracotta, and place it in a cool, sunny, and well-ventilated area to prevent root rot. Growing Lavender Outdoor Growing lavender outdoors requires six to eight hours of full sun and very well-drained, slightly alkaline soil, and low moisture once established. Plant in spring, space plants one to three inches apart, and avoid heavy, wet soil. Prune back one-third of the plants annually after flowering to prevent wood rot. Which Option Is Better? Step-by-Step Guide: How To Grow Lavender Plants Successfully Step 1: Choose the Right Lavender Variety Varieties with Lavender for Your Dry Herbs Choosing the right lavender depends on your climate and use. English lavender is best for cold hardiness zones five to nine and is best for cooking, while French lavender and Pinot Noir thrive in warmer areas with high humidity in zones 8 to 11. Choose Lavadin hybrids for intense aroma and oil production and larger size. Also Read: How Do I Grow Carrot Plants Indoors – Secret Tips for Bigger, Sweeter Carrots at Home! Step 2: Select the Perfect Location Choosing the best location for lavender is very important because these lavender plants are sensitive to waterlogging and require specific conditions to thrive. The ideal location provides optimal drainage and good air circulation. Step 3: Prepare Well-Draining Soil Lowlanders require sandy alkaline well-drained soil with a pH of 7 to 7.3. For optimum growth, mix equal parts of potting soil, coarse sand, and peat moss in about one part each and plant in raised mounds using terracotta pots, ensuring at least six hours of sun and good drainage. Step 4: Planting Lavender Seeds or Cuttings Lavenders is best propagated by two to four inch softwood semi-hardy cuttings in the summer for faster, uniform results or by starting from seed indoors 10 weeks before the last frost. Both methods require well-drained, sandy soil and full sun, and the cuttings should be kept moist and covered with plastic and should root in three to six weeks. While seeds require light to germinate, they may require a frost rating. Step 5: Watering the Right Way Watering lavender properly depends on the principle of drought tolerance once established. Overwatering is the most common cause of lavender plant death, which can cause root rot and ultimately a dead plant. The goal is to keep the soil lightly moist, never letting it dry out. Step 6: Provide Proper Sunlight To provide adequate sunlight for your allamander plant, place it in a location that receives full sun, defined as at least six to eight hours of direct sunlight per day. As a native of the Mediterranean, allamanders require high levels of light to thrive and produce fragrant flowers and to avoid becoming leggy. Step 7: Pruning and Maintenance Prune the lavenders twice a year, from the base in early spring to remove weather damage and later in late summer to maintain a plumulate dome shape. Cut back green stems and never into old wood. Care for it in full sun, well-drained soil, and minimal water and fertilizer. Best Soil, Pot, and Fertilizer for Lavender Ideal Soil Mix for Lavender Plants The ideal soil mix for under is a fast-draining nutrient-poor soil with an alkaline value of 6.5 to7.5 pH. A perfect mix contains equal parts of clay, hard, sharp sand grit, and perlite or comite to ensure excellent drainage. Avoid heavy soils with excessive organic matter and moisture-retaining soils. Choose The Right Pot For Soil For lavender, choose a 12- to 16-inch diameter terracotta or clay pot with ample drainage holes, and because this material allows the soil to dry out and prevents the roots from rotting, use a fast-draining potting mix to mimic the conditions of a Mediterranean garden, such as … Read more

How Do I Grow An Onion Plants Indoors – Easy Step-by-Step Guide for Beginners (Fast Results!)

How Do I Grow An Onion Plants Indoors

Growing onion plants indoors is a great low-maintenance way to jumpstart your gardening season or grow fresh, crisp green onions all year round. Growing full-sized, mature bulbs indoors requires space and light, making it difficult to start them indoors from seed or sets. It is most effective to start them indoors from seed or sets, as is growing smaller varieties of green onions for a quick, continuous harvest. In mid-February, sow onion seeds in random numbers in four plastic pots. I usually aim for 25 or more. I space them about one by one in the pot, lightly covering them with soil. I bury the seeds one by one or more and place a germination dome on top. How Do I Grow An Onion Plants Indoors Start the onions indoors by planting seeds one by four inches deep in trays with seed starting mix about eight to 10 weeks before your last frost date and keep the soil moist. Provide 12 to 14 hours of light through a grow light or bright window and maintain the surrounding temperature. Trim the tops back to four inches to encourage rooting. Also Read: Cactus Key Takeaways There are many techniques for growing onion plants at home, some of which are listed below. Step-by-Step Guide to Growing Cilantro Plants It is absolutely possible to grow onion seedlings at home. All you need is a little hard work, dedication, and patience. If you follow a few basic steps, you can easily grow the plants at home. Choose Quality Seeds To select high-quality onion seeds, choose varieties that are suitable for your local climate and daylight conditions, such as short-day and long-day varieties, non-hardy varieties, certified from a reputable supplier, and have a high germination rate of 80 to 90 percent. Disease resistance and the desired bulb size and color are preferred. Adequate and consistent moisture is essential for germination. Select the Proper Container Choosing the right container for onion plants depends on whether you are planting them for full-sized bulbs or for green onions. Since onions have a shallow root system but also need space to spread out, the best containers are at least 10 inches deep with excellent drainage. Use the Right Soil Mix Onion plants thrive in well-drained sandy loam or loam soil with a pH of 6.2 to 6.8. Improve heavy clay or sandy soil by mixing in one to two inches of compost or well-rotted manure to ensure high organic matter content. Soil should be loose for bulb expansion. Provides enough nitrogen to encourage leaf growth. Also Read: How Do I Grow Carrot Plants Indoors – Secret Tips for Bigger, Sweeter Carrots at Home! Planting Onion Seeds or Sets Onions can also be grown from either or both sets of small immature bulbs, with the latter offering greater variety and lower cost, while sets provide a quicker, easier and earlier start. Seeds require sowing indoors in late winter to early spring, while sets can be planted directly in the garden four to eight centimetres deep. Provide The Proper Light Onion plants require full sun, which means at least six to eight hours of direct, unfiltered sunlight per day, although more than 12 hours is best for maximum bulb formation. They rely heavily on light for energy and, importantly, to stimulate the bulbing process, which is determined by the number of daylight hours. Fertilizing for Healthy Growth For healthy, high-yielding onions, apply a suitable fertilizer such as 10-10-10 by weight at planting time. Then, apply a high-nitrogen side dressing every three to four weeks until mid-July to promote leaf growth. Onions need consistent moisture, sleepers, and high fertility to produce large bulbs. Usually, in late June or early July, when the bulbs begin to push out the soil, stop fertilizing. This is the best method. Harvesting Indoor Onions Harvest home-grown onions when 50 to 75 percent of the small yellow leaves have dried and fallen off, indicating maturity. To avoid bruising, gently lift the bulbs from the container using your hands or a small shovel and cure them in a warm, dry, well-ventilated area at 75 to 90 degrees for two to four weeks before trimming the tops to one to two inches for storage.They are ready to be cut approximately four to six weeks after planting and they reach their perfect size. Also Read: How To Grow Coriander Plant Indoor – Secret Tips for Fast Growth & Huge Harvest Common Problems When Growing Onions Indoors Many people make many mistakes while growing onions at home and then later face disappointment due to the difficulties. Below are the mistakes that you can avoid and enjoy a good onion crop. Mistakes To Avoid Many people make many mistakes when growing onion plants at home. Below are the mistakes that you can avoid and easily grow onion plants at home. Outdoors vs Indoors Onion Growing You can easily grow onion plants anywhere inside or outside the house, but there are some differences between them. Their care, their ingredients, the amount of light they need, and the amount of food they need are all different. The method of growing them indoors and outdoors is given below. Growing Onions Outdoors Plant onions outdoors in full sun for more than six hours a day in loose, well-drained soil with a pH of 6.0 to 7.0. Plant or transplant them four to six inches apart, one inch deep. Ensure consistent moisture two to four weeks before the last spring frost and fertilize every four weeks. Keep them weed-free to maximize bulb size. Growing Onions Indoors Growing onions indoors requires nutrient-rich soil, shallow containers no more than four inches deep, and 12 to 14 hours of sunlight per day. Start seeds 10 weeks before the last frost and plant them one to four inches deep, keeping the soil consistently moist. To encourage vigor, prune the plants back to three to four inches and transplant them outdoors when they are five to six inches tall. Also Read: How Do … Read more

How Do I Grow Carrot Plants Indoors? Simple Secrets to Grow Bigger and Sweeter Carrots at Home

How Do I Grow Carrot Plants Indoors

Use deep pots to grow carrots indoors. The container should be at least 10 to 12 inches deep with drainage holes. These holes should be filled with loose sandy potting mix. Plant the seeds about an inch deep in the soil. Keep the soil consistently moist and place in a sunny spot or under a grow light for 12 hours. Thin the plants to two to three inches apart and harvest in 55 to 80 days. Therefore, for indoor carrots and other long-day root crops, you need to maximize your light intensity during the short 12-hour photoperiod. How Do I Grow Carrot Plants Indoors Choose shallow-rooted root crops such as beets and grow them in containers at least 8 to 12 inches deep with drainage holes and use a loose sandy potting mix. Plant the seeds one to four inches deep and keep them consistently moist. Provide 10 to 12 hours of sunlight per day and maintain a moderate temperature. This is most effective for the plant. Also Read: Spinach Key Takeaways There are many ways to grow carrot plants at home that can benefit you greatly. Some of them are as follows: Understanding Carrot Growth Indoors Easy Ways to Grow Carrots Indoors Growing carrots indoors requires a cool area at least 8 to 12 inches deep with consistent moisture and more than six hours of bright light or more than 12 hours of LED light and use a loose sandy potting mix. Sow seeds lightly and thin out plants to prevent crowding. They take 10 to 16 weeks to mature, so be patient.So that your sweet red and flavorful carrots are ready to ripen. Step-by-Step Guide to Growing Carrot Plants Indoors There are many easy ways to grow carrots at home, all of which are listed below. Choose the Right Carrot Variety Choose a carrot variety based on your soil type, container depth, and intended use. Choose a hardy variety like snip or peri-cnn for heavy or shallow soil. Choose knotties for deep clay and he king. Use a grower for storage and juice extraction. For higher yields in deep soil, use a grower. These are the best carrot varieties that you can easily enjoy a carrot crop of your choice. Select a Deep Container Choose a container that is at least 12 to 20 inches deep for growing carrot roots. Make sure it has adequate drainage holes to prevent rot. Ideal options include a five-gallon plastic bucket, large cloth grow bags, or deep planters. Use a light, well-draining potting mix to allow the roots to straighten out. This is quite beneficial for the plant. Prepare Loose, Well-Draining Soil Preparing loose, well-drained soil is the most important step in growing straight, thornless, and healthy carrots. Carrots need a deep, light, nutrient-rich soil of 12 to 14 inches so that their roots do not encounter obstacles like rocks or compacted soil and can grow easily. Plant Carrot Seeds Properly Now the question is how do I grow carrot seedlings? A guide to planting and caring for the seedlings. Plant carrot seeds directly in loose, rock-free soil, spacing them 12 to 18 inches apart, inches deep and one to two inches apart. Maintain consistent moisture for 10 to 21 days until they sprout. Often use mulch to cover the soil and keep it moist. Once they reach a height of two to five inches, thin them to two to three inches. This is a complete guide to planting them. Also Read: How To Grow Coriander Plant Indoor – Secret Tips for Fast Growth & Huge Harvest Provide Proper Light Proper light soil, which means well-formed carrots and sweet carrots, requires specific conditions to grow. Basically, deep, loose loamy soil that is free of rocks and heavy clay. The plants thrive in full sun for six to eight hours a day and cool weather. For ideal growth, temperatures between 55 and 75 degrees Fahrenheit are essential for proper plant growth. Water Correctly Water carrots by keeping the soil consistently moist to prevent splitting and bitterness. Aim for one inch of water per week, increasing to two inches as the roots mature. Deep, occasional watering encourages root rot of long, straight roots, while overwatering causes stunted growth. Use drip irrigation or soak the rows thoroughly. This is the perfect way to water carrot plants. Thin Seedlings Early Thinning carrot seedlings early when they are two to three inches tall is essential to prevent overcrowding and spindly roots. Keep the initial spacing to one inch and then thin them a second time to two to three inches apart. Use scissors to cut the tops at the soil level so as not to disturb the roots. Fertilizing Carefully It is very important to fertilize carrots carefully because they are root crops that can become hairy or misshapen if overfed or given the wrong nutrients. It is essential for successful straight and sweet carrots. Keep nitrogen low, focus on phosphorus for roots, and potassium for flavor. Harvesting Indoor Carrots How to Grow Carrots Indoors in Flower Pots Indoor carrots are ready to harvest two to three months after sowing or when they start to develop a shoulder. Check for maturity by pushing away the soil to see the size of the root, up to an inch in diameter, and then gently twist and then pull upwards or use a small trowel to loosen the soil and avoid pulling the carrots, which will prove quite beneficial.Carrots in Pakistan are mainly harvested during the four-six day dry season from November to March, with the young being harvested from December to February and depending on the cool temperatures, harvesting is mostly done by hand 90 to 40 days after planting for best color and flavor. If loosening the soil by removing the roots is involved, the average yield is 10 to 18 tons per acre in Pakistan. Common Problems When Growing Carrots Indoors Many people face many problems when growing carrot plants at home. Below are the problems … Read more

How To Grow Coriander Plant Indoor – Easy Secrets to Grow Fresh, Fragrant Cilantro at Home

How To Grow Coriander Plant

Many people think that growing coriander indoors is quite difficult, but it is not at all. It is very easy to find coriander on Google because it is one of the herbs that grows very quickly and it is the fastest growing herb. Many people bring coriander from the market, but after some time it withers or loses its flavor, which does not give a good taste to food. So, you can grow your own coriander indoors and whenever you have to cook, you can break the coriander and add it, which will give the best taste and you will be able to enjoy it. Coriander can now be grown indoors easily with a little care, proper water, a small pot and proper lighting, and this basil grows perfectly indoors. Key Takeaways Of How To Grow Coriander Plant Here are some points that you can follow to easily grow coriander inside your home: Understanding Coriander Plant Basics What Is Coriander Plant? Coriander is one of the fastest growing herbs and it is very easy to grow indoors and you can also grow basil indoors from it. Some people think that coriander is very difficult to grow indoors, but this is not the case at all. Rather, it grows very easily indoors and you can grow it with a little care, proper water, proper lighting and in a small pot. It is used in various ways. The leaves are often used in salads etc. and coriander is used in cooking all over the world for its fresh taste and aroma. Coriander is an annual plant which means that it completes its life cycle in one season. It grows rapidly and if properly cared for, can be harvested several times. It grows indoors all year round. Also Read: Mentha Ideal Growing Conditions Best Time to Grow Coriander To grow coriander, you need a temperature of 15 to 25 degrees. Most coriander plants grow in spring, autumn or mild winter, as they are more susceptible to heat and the coriander plant grows very quickly, as its leaves grow less due to the temperature, which also reduces the flavor. That is why this plant thrives from spring to early summer. If you grow coriander indoors, you can plant it at any time of the year as long as you provide enough sunlight and maintain a comfortable temperature. Step-by-Step Guide – How To Grow Coriander Plant Successfully Step 1 – Choose Quality Coriander Seeds Choosing the right seeds is very important for growing coriander plants at home. A right seed helps a lot in growing coriander plants at home and that is what makes your plant grow. You can buy coriander seeds from the store and grow them at home or you can grow coriander from your kitchen. Just make sure that the seeds are not old but new because new seeds grow well and the seeds are not roasted because roasted seeds do not grow. To grow coriander plants quickly at home, crush coriander seeds in half and put them in water 12 to 24 hours before planting the coriander seeds and after 12 to 24 hours, take them out of the water and water them well, which will help your coriander plant grow very quickly and very well. Step 2 – Prepare the Soil Properly Soil also plays a very important role in growing coriander plants healthily and well. You must use soft and well-drained soil because this plant likes soft soil. Avoid too hard, compact or heavy soil because it can hold too much water and can cause root rot. And be careful that you keep the soil slightly moist and avoid overwatering. You can also prepare a spice soil mixture by mixing garden soil and sand in equal parts. Before planting, make sure that the soil is soft and free of stones or debris. Step 3 – Sow the Seeds Correctly Sowing the seeds correctly is also an important step in successfully growing coriander plants. After preparing your seeds and soil, sprinkle crushed coriander seeds on top of the soil surface and bury your coriander seeds 0.5 or 1 inch below the soil surface. Sowing the seeds too deep can cause problems for the coriander plant to grow. After planting the seeds, lightly moisten the soil with a spray bottle or any container, etc. Add water lightly so that the coriander seeds do not become displaced and stay in place. After about 7 to 10 days, your coriander plant will start to grow. Step 4 – Watering Techniques While learning how to grow coriander plants, it is also important to provide proper watering because both overwatering and underwatering can harm the plant. Coriander likes moist soil. It does not like too much water, so give it a light watering when the top inch or two of the soil feels dry. Give it enough water to moisten the soil. Avoid overwatering. When you sow the seeds, water them with a spray bottle or container. Later, when they start to sprout, you can water them normally and make sure that there are drainage holes in the pot because standing water for too long can cause coriander roots to rot. Watering is necessary every one to two days if the soil feels dry. Also Read: How To Grow Banana Plants Indoors – Easy Step-by-Step Guide for Big Leaves & Fast Growth Step 5 – Provide Proper Sunlight Light also plays a very important role in growing coriander plants at home. That is why if you are growing coriander plants at home, place them in a south or west-facing window because the south and west-facing windows receive more light during the day. Coriander plants need 6 to 8 hours of light for optimal growth. If you keep them in a grow light, they need 10 to 12 hours of light daily. If you give them the right light, your plant will grow healthy and fast. If there is any deficiency in its light, your … Read more

How Do You Grow Cilantro Plants – A Simple Guide to Growing Fresh Cilantro at Home

How Do You Grow Cilantro Plants

Siltrano is a fast-growing, cool-season annual herb that grows from seed in full sun to partial shade with well-drained soil. Plant in early spring or fall because the heat causes it to flower early. Sow seeds one to four inches deep, one to two inches apart. Keep the soil moist for about 40 to 45 days for a harvest.Growing the plant from seed is quite easy, although small plants can be found at local nurseries. Cilantro is a member of the carrot family. Due to its taproot, it is best to sow the seeds directly into a bed or container. How Do You Grow Cilantro Plants Grow cayenne pepper by direct sowing seeds 1/4 to 1/2 inch deep in well-drained soil as it does not like transplanting due to its taproot and for continuous harvest, transplant every two to three weeks in full sun or afternoon shade in hot climates. Keep the soil consistently moist. Space the seedlings six inches apart. Harvest within 40 to 45 days. Plant cayenne pepper in an area that receives full sun and has a pH of 6.2 to 6.0. If you live in a warm climate, offer afternoon shade. Improve the soil by adding 1/4 inch of old compost or other rich organic matter. Consider a premium back-potting mix for growing in containers. Also Read: Cactus Key Takeaways To grow red pepper plants at home, you need to follow a few tips, some of which are listed below. Step-by-Step Guide to Growing Cilantro Plants There are many important steps to grow red pepper plants at home, by following which you can easily grow red pepper plants at home and benefit from them for a long time. Those steps are mentioned below. Choose Quality Seeds For high-quality red chillies in Pakistan, choose F1 hybrid seeds for half the yield and fast growth or Paul Neyland OP seeds for reliable flavor. Look for slow bolting broad-leaf varieties like Sanjeta to ensure consistent harvest. Top retailers include Daraz Seed and Apna Agao Seed Sellers. These are reliable sellers who can help you expand your seed varieties and lineage to a great extent. Select the Right Location Choosing the right location for red chillies is a very important process to prevent the plant from going to seed early as it thrives in cool, mild climates. To maintain a healthy leafy crop, the ideal location needs to balance sunlight with temperature control, and location selection is more important than the extremes in the house. Always choose a west or south facing window where it can receive full sunlight. Also Read: How To Grow Rosemary Plants Indoors – Easy Secrets for Fast Growth & Healthy Plants Prepare Well-Draining Soil For plants, use well-drained soil and prepare sandy or loamy soil with two to three inches of peat moss to improve aeration and nutrient content, aiming for a pH of 6.2 to 6.8. For containers, use a light, aerated commercial potting mix with perlite or vermiculite. Plant cayenne pepper in an area that gets full sun and grow cayenne pepper using well-drained soil. If you live in a hot climate, provide afternoon shade and improve the native soil by mixing in an inch of aged compost or other rich organic matter. Plant the Seeds Correctly To successfully grow plants, direct seeding in cool weather is required because the plant has a delicate seedbed that dislikes being moved, and to ensure continuous harvest, plant the plants in rows and use the best method of using them. Sow new seeds every two to three weeks. You can plant your plants one or two inches apart for young shoots. Use a six-inch round pot and place about 10 seeds on top of the soil, then cover them with one centimeter of Seed and cover with a layer of soil. Water Properly Water the red pepper regularly to keep the soil consistently moist but not waterlogged, aiming for about an inch of water per week. Test the soil for moisture every few days, then water when the top inch is dry to prevent bolting and wilting. Water at the base. Always avoid overhead watering to prevent plant diseases. Provide Proper Light To provide adequate light for your red pepper plant, strike a balance that promotes maximum leaf growth while preventing the plant from bolting and flowering at a minimum due to excess heat. Red peppers require six to eight hours of sunlight per day, but prefer cool, indirect sunlight in hot weather. Provide the plant with six to eight hours of direct sunlight per day or choose a south- or west-facing window in your home that receives direct sunlight. Thin and Maintain Plants Once the plants are several inches tall, pinch back the growing tips to encourage branching and bushiness. Cayenne peppers crave moist soil, so check the soil every couple of days and make sure the plants in the beds get about an inch of water per week. Also Read: How To Grow A Pineapple Plant From The Top – Easy Home Growing Trick Harvesting Correctly Cut the outer stems close to the ground and harvest the red peppers when they reach six to 12 inches. The center crown remains to regrow. Never cut more than one-third of the plant at once and for maximum flavor, morning is the best time to harvest and regularly delay bolting. This will help greatly in improving the growth of your plant. Growing Cilantro Indoors vs Outdoors Growing Cilantro Indoors Growing red pepper plants indoors requires a six- to eight-inch deep pot with good drainage and a high-quality potting mix and five to six hours of direct sunlight or 12 to 16 hours of artificial light. Sow the seeds one to four inches deep and keep them moist at a temperature of 60 to 75 degrees Fahrenheit and expect them to sprout in seven to 14 days. When the plants are four to six inches tall, prune the outer leaves and ensure consistent moisture, but always avoid … Read more

How To Grow A Pineapple Plant From The Top – Easy Step-by-Step Guide for Beginners

How To Grow A Pineapple Plant From The Top

Have you ever cut a fresh pineapple and wondered if you could grow a new plant from a small piece of leaf? Many people try to do this, only to be left with a rotting crown that never grows properly. The good news is that it is possible to grow a pineapple plant from the top, even indoors. If you follow the right steps and provide it with proper care, proper preparation, adequate lighting and a little patience, that leftover crown can grow into a healthy plant. In this complete guide, you will learn exactly how to successfully grow a pineapple plant from the top without making any common mistakes. Growing a pineapple plant at home is quite easy, all it takes is a little hard work, patience and steps. If you follow these steps, you can enjoy a nice pineapple.This guide will tell you in detail how to grow your own pineapple plant at home. The good news is that pineapple plants can be grown very easily at home. Most people think that pineapple plants cannot grow at home, so they quickly become disappointed. No need to despair. How Do I Grow A Pineapple Plant From The Top? When you are growing a pineapple plant correctly and it is easy to grow a pineapple plant from the top, start by choosing a fresh, healthy pineapple with strong green leaves. Turn the leafy crown over rather than cutting from the bottom and remove the remaining flesh of the fruit from the base to prevent rot. Peel the lower leaves to expose about an inch of the stem where the roots will form. Next, let the crown dry for a minute or two so that the vine can form root collars. Each step is important because this reduces the risk of fungal infections. Once dry, place the base in a glass or a glass of water. Just cover the bottom. You can plant it directly in well-drained soil. If the roots are in water, change the water every few days and let them grow about two to three inches long before transplanting into the ground. Wait and provide the plant with direct sunlight. Place in a warm spot. Water lightly. Keep the soil fairly moist but never too wet. Root once more if necessary. Will be established in a few weeks and the leaves will grow steadily and under ideal conditions the fruit can be ready in 18 to 24 months. This shows that growing a pineapple plant at home is quite easy and does not require much care. With just a little effort and attention and care, you can easily enjoy a nice and clean healthy strong pineapple and this is a great hobby for you. Also Read: Carduus Key Takeaways Of How do you grow a pineapple plant There are many tips for growing and promoting pineapple plants at home. Just follow their tips. Some of them are as follows: If you follow all the things that have been told to you, you can easily succeed in getting a healthy pineapple. All that is needed is constant care, attention, adequate amount of water and a few other things. After fulfilling these things, you can easily succeed in getting it and it will prove to be very good for you. Step-by-Step Guide to Growing a Pineapple from the Top There are some very important steps to growing pineapple at home. If you follow these steps, you can enjoy a good harvest and fresh pineapple. All those steps are listed below. Choose the Right Pineapple The first step to successfully growing a pineapple plant from the top is to choose a healthy, ripe fruit. The choice of fruit also has a great impact on its healthy growth. Look for a pineapple with strong green leaves that are not dead or damaged at the ends. Avoid fruit that shows signs of rot or excessive soft spots, as these can indicate disease that can spread to the crown. Choose a pineapple that feels heavy for its size and has a fresh aroma at the base. The crown should be firm and should not be damaged during handling or transportation. Starting with a strong, healthy sapling increases the chances of successful rooting and a strong plant that can eventually produce fruit. And if you want to grow pineapple seedlings, choose a pineapple of the best breed that is free from any disease so that your pineapples will not be affected. Remove the Crown Properly Removing the pineapple crown properly is essential to prevent damage and increase the chances of successful growth. Many people start by twisting the children from the top instead of cutting from the bottom because twisting protects the base where the roots will form. If twisting is difficult, you can use a sharp, clean knife to cut the flesh of the fruit just above the top, leaving about half an inch of the stem attached to the crown. Removing the pineapple crown properly is essential to prevent damage and increase the chances of successful growth. Instead of cutting too far down, start by twisting the leaves from the top because twisting protects the base and will form roots. If twisting is difficult, you can use a sharp, clean knife to cut just above the flesh of the fruit, leaving about half an inch of the stem attached to the crown. This will encourage your plant to grow very well and enjoy it. Remove Lower Leaves After separating the crown from the pineapple, the next step is to remove the lower leaves at the base. Remove about an inch or two of the stem with a pruner and optionally remove two to three layers of leaves where the roots will grow. It is important to expose this part of the stem because it allows the plant to be removed more easily from the roots and reduces the risk of rot. Be gentle to avoid damaging the crown and make sure that … Read more

How To Grow Banana Plants Indoors – A Simple Guide to Growing Banana Trees at Home

How To Grow Banana Plants Indoors

Growing banana plants indoors requires a sunny, warm, and humid environment. Preferably near a south-facing window. Use a well-drained, nutrient-rich potting soil, such as a mix of compost and perlite, and water frequently to keep the soil moist. Growing banana plants indoors is considered very easy. All it takes is a little effort, attention, and following the steps.Now the question is, is it possible to grow a banana plant at home? The answer is yes, absolutely. It is possible to grow a banana plant at home and it survives for a very long time as long as it gets adequate light and moisture. This continues to prove beneficial. How To Grow Banana Plants Indoors Successfully To successfully grow banana plants indoors, choose a variety like Moss Dwarf or Kevin Dish and provide 12 to 16 hours of bright light per day and maintain a temperature of 65 to 80 degrees Fahrenheit for optimal growth. They need consistent humidity, water frequently daily, maintain a high humidity of about 60 to 90 percent, and fertilize biweekly during the growing season. For good growth and yield, the crop requires a balanced fertilizer such as 10:10 NPK ratio. Nitrogen is essential for early growth and potassium promotes disease resistance and flower development, which is very effective for early plant growth. Also Read: Grape Key Takeaways There are many tips for growing banana plants at home, which if understood well can be very beneficial to you. Here are a few of them: Understanding Banana Plants Indoors Banana plants may look like trees, but they are actually large herbs with a soft, woody stem, like a siu siu stadium. Indoors, they grow with broad, dramatic leaves that grow straight up and down, and can quickly become the centerpiece of any room. However, their nature means that they require specific conditions to stay healthy, primarily strong light, warmth, and fairly low humidity. When grown indoors, banana plants generally focus on producing green foliage rather than fruit. Fruiting is possible, but it requires consistent feeding and plenty of space for the plant to mature. Even without bananas, indoor plants can be impressive, beautiful, and grow quickly when properly cared for. This is a great and exciting hobby that you will enjoy a lot. Best Banana Varieties for Indoor Growing There are many types of banana plants, but some types are very good for growing at home. All of them are listed below. These are the types of banana plants that you can easily plant at home, which will give you good results and fruits after a little effort. With this, you can easily use them to enhance the beauty of your home and get good bananas with proper effort and attention. Step-by-Step Guide to Growing Banana Plants Indoors There are many basic steps to grow banana plants at home. If you follow these steps, you can easily grow a banana plant in your home, which will add to the beauty of your home. Those steps are listed below in more detail. Choose the Right Variety The best types of banana plants for indoors are compact and ornamental varieties that thrive in pots and warm sunny conditions. All Angels Choice includes Draft, which grows to about six to eight feet tall, and Cane Dish, Super Draft, which grows to about three feet tall, and Trillidini, another type of banana plant that grows to about two to three feet tall. These include all of these, which can produce edible fruit and are ideal for fast-growing plants. Choose a seasonal tribe and choose a plant type that is adaptable to your environment and your current needs. Also Read: How To Grow Rosemary Plants Indoors – Easy Secrets for Fast Growth & Healthy Plants Select a Large, Stable Container To successfully grow banana plants indoors, choosing a large and sturdy container is essential due to their fast-growing and extremely heavy nature. Mature indoor plants require containers that have a capacity of about 15 to 25 gallons. To accommodate the extensive root system, the pot should ideally be 20 to 24 inches deep and 20 to 25 inches wide. For growing a typical banana plant indoors, the right choice of container plays a major role in the optimal growth of the banana plant. Use Rich, Well-Draining Soil Banana plants require rich, well-draining soil that is consistently moist but never waterlogged. The ideal soil for bananas should be loose and nutrient-rich, with a pH between 5.5 and 7.0. Since they are rot-tolerant, they benefit from a soil amended with plenty of organic matter, such as compost or well-rotted manure. Banana plants require rich, well-drained soil. Water deeply and regularly, but avoid overwatering your banana plant or allowing the soil to become waterlogged, which can lead to root rot. Provide Proper Light Banana plants need bright sunlight to thrive. They typically need six to eight hours of direct sunlight per day. They are sun-loving plants that grow fastest in full sun, although they can tolerate partial shade. Most varieties of banana tree plants prefer to grow in full sun, meaning they need at least six hours of direct sunlight most days. However, the more sunny varieties can burn quickly and do better in a spot with plenty of indirect light in partial shade. They tolerate indirect light levels better than a minute dish of moss in front of them. Water Correctly Banana plants need deep watering to keep the soil moist but not waterlogged as they are 80 percent water sensitive to root rot. Water daily two to three times a week in hot and growing seasons and reduce the frequency to one to two times a week in winter. Pay attention to watering at the base to avoid leaf disease and they prefer moist soil but not waterlogged soil as over watering can rot the roots and water the plants deeply allowing the water to penetrate the soil and prevent re-watering.First, wait for the top two and a half centimeters of soil to … Read more